练习 - 使用自适应卡片返回丰富的响应
首先,为代理生成自适应卡片模板,以在其响应中显示数据。 若要生成自适应卡片模板,请使用自适应卡片预览器Visual Studio Code扩展直接在 Visual Studio Code 中轻松预览工作。 使用 扩展可以生成一个自适应卡片模板,其中包含对数据的引用。 在运行时,代理使用从 API 检索的数据填充占位符。
下载初学者项目
首先下载示例项目。 在 Web 浏览器中:
导航到 https://github.com/microsoft/learn-declarative-agent-api-plugin-adaptive-cards-typescript。
如果你有 GitHub 帐户:
选择“ 使用此模板 ”下拉列表,然后从菜单中选择 “创建新存储库”。

从可用所有者列表中,选择你的帐户。
将存储库命名 为 da-ristorante-api。
使用“创建存储库”按钮确认 创建存储库 。
等待 GitHub 创建存储库。 然后,复制存储库 URL。

打开命令行。
在命令行中,将工作目录更改为要将项目存储在磁盘上的位置。
使用以下命令克隆存储库:
git clone https://github.com/your-user/your-repo。在 Visual Studio Code 中打开克隆的文件夹。
如果没有 GitHub 帐户:
以 ZIP 的形式下载存储库内容。

提取磁盘上的 ZIP 内容。
在 Visual Studio Code 中打开文件夹。


示例项目是一个 Microsoft 365 Agents Toolkit 项目,其中包含一个声明性代理,其中包含使用 API 插件生成的作。 API 插件连接到在项目中也包含Azure Functions上运行的匿名 API。 API 属于一家虚构的意大利餐厅,允许你浏览今天的菜单和下单。
为盘子生成自适应卡片
首先,创建一个自适应卡片,用于显示有关单个菜的信息。
在 Visual Studio Code:
在 “资源管理器” 视图中,创建名为 cards 的新文件夹。
在 card 文件夹中,创建一个名为 dish.json 的新文件。 粘贴以下表示空自适应卡片的内容:
{
  "$schema": "http://adaptivecards.io/schemas/adaptive-card.json",
  "type": "AdaptiveCard",
  "version": "1.5",
  "body": []
}
在继续之前,请为自适应卡创建数据文件:
在 macOS 上按 ctrl+P (CMD+P ,) 键盘上打开命令面板。 键入
>Adaptive以查找与使用自适应卡片相关的命令。
从列表中选择 “自适应卡片:新建数据文件”。 Visual Studio Code创建名为 dish.data.json 的新文件。
将其内容替换为表示菜的数据:
{
  "id": 4,
  "name": "Caprese Salad",
  "description": "Juicy vine-ripened tomatoes, fresh mozzarella, and fragrant basil leaves, drizzled with extra virgin olive oil and a touch of balsamic.",
  "image_url": "https://raw.githubusercontent.com/pnp/copilot-pro-dev-samples/main/samples/da-ristorante-api/assets/caprese_salad.jpeg",
  "price": 10.5,
  "allergens": [
    "dairy"
  ],
  "course": "lunch",
  "type": "dish"
}
Save your changes
返回到 dish.json 文件。
从镜头中选择“ 预览自适应卡片”。

Visual Studio Code在侧边打开卡预览。 编辑卡时,更改将立即显示在一侧。
在 正文 数组中,添加一个 Container 元素,其中包含对 存储在 image_url 属性中的图像 URL 的引用。
{
  "type": "Container",
  "items": [
    {
      "type": "Image",
      "url": "${image_url}",
      "size": "large"
    }
  ]
}
请注意卡预览版如何自动更新以显示卡:

添加对其他菜属性的引用。 完整的卡如下所示:
{
  "$schema": "http://adaptivecards.io/schemas/adaptive-card.json",
  "type": "AdaptiveCard",
  "version": "1.5",
  "body": [
    {
      "type": "Container",
      "items": [
        {
          "type": "Image",
          "url": "${image_url}",
          "size": "large"
        },
        {
          "type": "TextBlock",
          "text": "${name}",
          "weight": "Bolder"
        },
        {
          "type": "TextBlock",
          "text": "${description}",
          "wrap": true
        },
        {
          "type": "TextBlock",
          "text": "Allergens: ${if(count(allergens) > 0, join(allergens, ', '), 'none')}",
          "weight": "Lighter"
        },
        {
          "type": "TextBlock",
          "text": "**Price:** €${formatNumber(price, 2)}",
          "weight": "Lighter",
          "spacing": "None"
        }
      ]
    }
  ]
}
请注意,若要显示过敏原,请使用 函数将过敏原联接到字符串中。 如果一道菜没有过敏原,你 没有显示。 为确保正确设置价格格式,请使用 formatNumber 函数,该函数允许我们指定要在卡中显示的小数位数。


为订单摘要生成自适应卡片
示例 API 允许用户浏览菜单并下订单。 让我们创建一个显示订单摘要的自适应卡。
在 Visual Studio Code:
在 card 文件夹中,创建名为 order.json 的新文件。 粘贴以下表示空自适应卡片的内容:
{
  "$schema": "http://adaptivecards.io/schemas/adaptive-card.json",
  "type": "AdaptiveCard",
  "version": "1.5",
  "body": []
}
为自适应卡创建数据文件:
在 macOS 上按 ctrl+P (CMD+P ,) 键盘上打开命令面板。 键入
>Adaptive以查找与使用自适应卡片相关的命令。
从列表中选择 “自适应卡片:新建数据文件”。 Visual Studio Code创建名为 order.data.json 的新文件。
将其内容替换为表示订单摘要的数据:
{
  "order_id": 6210,
  "status": "confirmed",
  "total_price": 25.48
}
Save your changes
返回到 order.json 文件。
从镜头中选择“ 预览自适应卡片”。
接下来,将 order.json 文件的内容替换为以下代码:
{
  "$schema": "http://adaptivecards.io/schemas/adaptive-card.json",
  "type": "AdaptiveCard",
  "version": "1.5",
  "body": [
    {
      "type": "TextBlock",
      "text": "Order Confirmation 🤌",
      "size": "Large",
      "weight": "Bolder",
      "horizontalAlignment": "Center"
    },
    {
      "type": "Container",
      "items": [
        {
          "type": "TextBlock",
          "text": "Your order has been successfully placed!",
          "weight": "Bolder",
          "spacing": "Small"
        },
        {
          "type": "FactSet",
          "facts": [
            {
              "title": "Order ID:",
              "value": "${order_id} "
            },
            {
              "title": "Status:",
              "value": "${status}"
            },
            {
              "title": "Total Price:",
              "value": "€${formatNumber(total_price, 2)}"
            }
          ]
        }
      ]
    }
  ]
}
与上一部分一样,将卡上的每个元素映射到数据属性。

重要
请注意 ${order_id} 后面的尾随空格。 这是有意的,因为自适应卡片呈现数字存在已知问题。 若要测试它,请删除空格,并查看数字是否从预览中消失。

还原尾随空间,以便卡正确显示并保存更改。


更新 API 插件定义
最后一步是使用 Copilot 应用来向用户显示 API 中的数据的自适应卡更新 API 插件定义。
添加自适应卡片以显示菜
在 Visual Studio Code:
打开 卡片/dish.json 文件并复制其内容。
打开 appPackage/ai-plugin.json 文件。
在 functions.getDishes.capabilities.response_semantics 属性中,添加一个名为 static_template 的新属性,并将其内容设置为自适应卡片。
完整的代码片段如下所示:
{
  "$schema": "https://aka.ms/json-schemas/copilot/plugin/v2.1/schema.json",
  "schema_version": "v2.1",
  "namespace": "ilristorante",
  "name_for_human": "Il Ristorante",
  "description_for_human": "See the today's menu and place orders",
  "description_for_model": "Plugin for getting the today's menu, optionally filtered by course and allergens, and placing orders",
  "functions": [
    {
      "name": "getDishes",
      "description": "Returns information about the dishes on the menu. Can filter by course (breakfast, lunch or dinner), name, allergens, or type (dish, drink).",
      "capabilities": {
        "response_semantics": {
          "data_path": "$.dishes",
          "properties": {
            "title": "$.name",
            "subtitle": "$.description"
          },
          "static_template": {
            "$schema": "http://adaptivecards.io/schemas/adaptive-card.json",
            "type": "AdaptiveCard",
            "version": "1.5",
            "body": [
                ...trimmed for brevity
            ]
          }
        }
      }
    },
    {
      "name": "placeOrder",
      "description": "Places an order and returns the order details",
      "capabilities": {
        "response_semantics": {
          "data_path": "$",
          "properties": {
            "title": "$.order_id",
            "subtitle": "$.total_price"
          }
        }
      }
    }
  ],
  "runtimes": [
    {
      "type": "OpenApi",
      "auth": {
        "type": "None"
      },
      "spec": {
        "url": "apiSpecificationFile/ristorante.yml"
      },
      "run_for_functions": [
        "getDishes",
        "placeOrder"
      ]
    }
  ],
  "capabilities": {
    "localization": {},
    "conversation_starters": []
  }
}
保存所做的更改。
添加自适应卡片模板以显示订单摘要
在 Visual Studio Code:
打开 卡片/order.json 文件并复制其内容。
打开 appPackage/ai-plugin.json 文件。
在 functions.placeOrder.capabilities.response_semantics 属性中,添加名为 static_template 的新属性,并将其内容设置为自适应卡片。
完整文件如下所示:
{
  "$schema": "https://aka.ms/json-schemas/copilot/plugin/v2.1/schema.json",
  "schema_version": "v2.1",
  "namespace": "ilristorante",
  "name_for_human": "Il Ristorante",
  "description_for_human": "See the today's menu and place orders",
  "description_for_model": "Plugin for getting the today's menu, optionally filtered by course and allergens, and placing orders",
  "functions": [
    {
      "name": "getDishes",
      "description": "Returns information about the dishes on the menu. Can filter by course (breakfast, lunch or dinner), name, allergens, or type (dish, drink).",
      "capabilities": {
        "response_semantics": {
          "data_path": "$.dishes",
          "properties": {
            "title": "$.name",
            "subtitle": "$.description"
          },
          "static_template": {
            "$schema": "http://adaptivecards.io/schemas/adaptive-card.json",
            "type": "AdaptiveCard",
            "version": "1.5",
            "body": [
                ...trimmed for brevity
            ]
          }
        }
      }
    },
    {
      "name": "placeOrder",
      "description": "Places an order and returns the order details",
      "capabilities": {
        "response_semantics": {
          "data_path": "$",
          "properties": {
            "title": "$.order_id",
            "subtitle": "$.total_price"
          },
          "static_template": {
            "$schema": "http://adaptivecards.io/schemas/adaptive-card.json",
            "type": "AdaptiveCard",
            "version": "1.5",
            "body": [
                ...trimmed for brevity
            ]
          }
        }
      }
    }
  ],
  "runtimes": [
    {
      "type": "OpenApi",
      "auth": {
        "type": "None"
      },
      "spec": {
        "url": "apiSpecificationFile/ristorante.yml"
      },
      "run_for_functions": [
        "getDishes",
        "placeOrder"
      ]
    }
  ],
  "capabilities": {
    "localization": {},
    "conversation_starters": []
  }
}
保存所做的更改。
在 智能 Microsoft 365 Copilot 副驾驶® 中使用 API 插件测试声明性代理
最后一步是在 智能 Microsoft 365 Copilot 副驾驶® 中使用 API 插件测试声明性代理。
在 Visual Studio Code:
从 活动栏中,选择 “Microsoft 365 代理工具包”。
在“帐户”部分中,确保已使用 智能 Microsoft 365 Copilot 副驾驶® 登录到 Microsoft 365 租户。

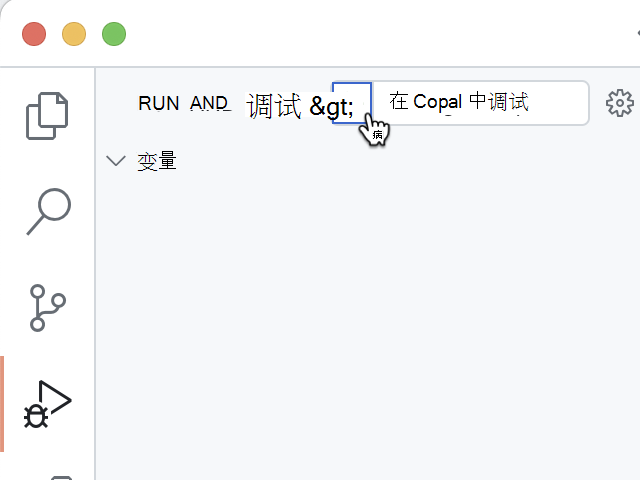
在 活动栏中,选择 “运行并调试”。
选择“ 在 Copilot 中调试 ”配置,并使用“开始调试”按钮 开始调试 。
Visual Studio Code生成项目并将其部署到 Microsoft 365 租户,并打开一个新的 Web 浏览器窗口。


在 Web 浏览器中:
出现提示时,使用属于 Microsoft 365 租户的帐户使用 智能 Microsoft 365 Copilot 副驾驶® 登录。
从侧边栏中,选择“ Il Ristorante”。

选择 “今天午餐是什么?” 对话启动器并提交提示。

出现提示时,检查代理发送到 API 的数据,并使用 “允许一次 ”按钮进行确认。

等待代理响应。 请注意,引文上的弹出窗口现在包含自定义自适应卡片,其中包含来自 API 的其他信息。

通过在提示文本框中键入订单: 1x 意大利面,1x冰茶 并提交提示。
检查代理发送到 API 的数据,然后使用 “确认 ”按钮继续。

等待代理下订单并返回订单摘要。 请注意,由于 API 返回单个项,因此代理使用自适应卡片呈现它,并在其响应中直接包含卡。

返回Visual Studio Code并停止调试。
切换到“ 终端 ”选项卡并关闭所有活动终端。


