在本教程中,你会手动将 OPC UA 资产添加到 Azure IoT 操作群集。 这些资产将消息发布到 Azure IoT 操作群集中的 MQTT 代理。 通常,OT 用户完成这些步骤。
资产是表示设备、计算机、系统或流程的物理设备或逻辑实体。 例如,物理资产可以是泵、电机、储罐或生产线。 定义的逻辑资产可以具有属性、流数据点或生成事件。
OPC UA 服务器是与资产通信的软件应用程序。 OPC UA 标记是 OPC UA 服务器公开的数据点。 OPC UA 标记可以提供有关资产状态、性能、质量或条件的实时或历史数据。
在本教程中,你将使用操作体验 Web UI 创建资产。 还可以使用 Azure CLI 完成其中一些任务。
先决条件
启用了安全设置的 Azure IoT 操作实例,部署在 Kubernetes 群集中。 若要创建实例,请使用以下内容之一部署 Azure IoT 操作:
- 快速入门:使用 K3s 在 GitHub Codespaces 中运行 Azure IoT 操作提供了简单的说明来部署可用于教程的 Azure IoT 操作实例。 然后,若要启用安全设置,请按照 Azure IoT作中的“启用安全设置”中的步骤作。
- 部署概述提供了使用 Azure Kubernetes 服务边缘软件包在 Windows 上或使用 K3s 在 Ubuntu 上部署 Azure IoT 操作实例的详细说明。 按照部署指南中的步骤进行安全设置的部署。
启用安全设置后,包含 Azure IoT作实例的资源组还包含以下资源:
- 一个 Azure 密钥保管库实例,用于存储要同步到 Kubernetes 群集的机密。
- 一个用户分配的托管标识,Azure IoT 操作使用它来访问 Azure 密钥保管库实例。
- Azure IoT 操作组件(如数据流)可以使用用户分配的托管身份来连接到云端点,例如 Azure 事件中心。
确保在配置安全设置时,授予你的用户帐户管理机密的权限,并赋予其“密钥保管库机密主管”角色。
若要登录到操作体验 Web UI,则需要至少具有包含 Kubernetes - Azure Arc 实例的资源组参与者权限的 Microsoft Entra ID 帐户。 若要了解详细信息,请参阅操作体验 Web UI。
可以在 Bash 或 PowerShell 环境中运行本教程中的控制台命令,除非另有说明。
我们将解决什么问题?
OPC UA 服务器公开的数据可能具有复杂的结构,并且难以理解。 Azure IoT 操作提供了一种将 OPC UA 资产建模为标记、事件和属性的方法。 通过此建模,可以更轻松地了解数据并在下游流程(例如,MQTT 代理和数据流)中使用它。
本教程还介绍如何使用 Azure Key Vault 中存储的凭据向模拟 OPC UA 服务器进行身份验证。
部署 OPC PLC 模拟器
本教程使用 OPC PLC 模拟器生成示例数据。 部署 OPC PLC 模拟器:
从 GitHub 存储库下载 opc-plc-tutorial-deployment.yaml 文件。 若要使用命令行下载,请运行以下命令:
wget https://raw.githubusercontent.com/Azure-Samples/explore-iot-operations/refs/heads/main/samples/quickstarts/opc-plc-tutorial-deployment.yaml -O opc-plc-tutorial-deployment.yamlopc-plc-tutorial-deployment.yaml打开在文本编辑器中下载的文件,并更改模拟器的密码。 密码是通过--defaultpassword参数设置的。 记下密码值,稍后需要用到它。 然后保存所做的更改。若要将 OPC PLC 模拟器部署到群集,请运行以下命令:
kubectl apply -f opc-plc-tutorial-deployment.yaml
以下代码片段显示了已应用的 YAML 文件:
apiVersion: apps/v1
kind: Deployment
metadata:
  name: opc-plc-000000
  namespace: azure-iot-operations
  labels:
    app.kubernetes.io/component: opcplc-000000
spec:
  replicas: 1
  selector:
    matchLabels:
      app.kubernetes.io/component: opcplc-000000
  template:
    metadata:
      labels:
        app.kubernetes.io/component: opcplc-000000
    spec:
      containers:
      - name: opc-plc
        image: mcr.microsoft.com/iotedge/opc-plc:latest
        args:
          - "--plchostname=opcplc-000000"
          - "--portnum=50000"
          - "--certdnsnames=opcplc-000000"
          - "--unsecuretransport"
          - "--showpnjsonph"
          - "--slownodes=5"
          - "--slowrate=10"
          - "--fastnodes=10"
          - "--fasttypelowerbound=212"
          - "--fasttypeupperbound=273"
          - "--fasttyperandomization=True"
          - "--veryfastrate=1000"
          - "--guidnodes=1"
          - "--appcertstoretype=FlatDirectory"
          - "--dontrejectunknownrevocationstatus"
          - "--disableanonymousauth"
          - "--defaultuser=contosouser"
          - "--defaultpassword=contosouserpassword"
        ports:
        - containerPort: 50000
        volumeMounts:
          - name: opc-plc-default-application-cert
            mountPath: /app/pki/own
          - name: opc-plc-trust-list
            mountPath: /app/pki/trusted
      volumes:
        - name: opc-plc-default-application-cert
          secret:
            secretName: opc-plc-default-application-cert
        - name: opc-plc-trust-list
          secret:
            secretName: opc-plc-trust-list
      serviceAccountName: opcplc-000000-service-account
---
apiVersion: v1
kind: Service
metadata:
  name: opcplc-000000
  namespace: azure-iot-operations
  labels:
    app.kubernetes.io/component: opcplc-000000
spec:
  type: ClusterIP
  selector:
    app.kubernetes.io/component: opcplc-000000
  ports:
    - port: 50000
      protocol: TCP
      targetPort: 50000
---
apiVersion: cert-manager.io/v1
kind: Issuer
metadata:
  name: opc-plc-self-signed-issuer
  namespace: azure-iot-operations
  labels:
    app.kubernetes.io/component: opcplc-000000
spec:
  selfSigned: {}
---
apiVersion: cert-manager.io/v1
kind: Certificate
metadata:
  name: opc-plc-default-application-cert
  namespace: azure-iot-operations
  labels:
    app.kubernetes.io/component: opcplc-000000
spec:
  secretName: opc-plc-default-application-cert
  duration: 2160h # 90d
  renewBefore: 360h # 15d
  issuerRef:
    name: opc-plc-self-signed-issuer
    kind: Issuer
  commonName: OpcPlc
  dnsNames:
    - opcplc-000000
    - opcplc-000000.azure-iot-operations.svc.cluster.local
    - opcplc-000000.azure-iot-operations
  uris:
    - urn:OpcPlc:opcplc-000000
  usages:
    - digital signature
    - key encipherment
    - data encipherment
    - server auth
    - client auth
  privateKey:
    algorithm: RSA
    size: 2048
  encodeUsagesInRequest: true
  isCA: false
---
apiVersion: v1
kind: Secret
metadata:
  name: opc-plc-trust-list
  namespace: azure-iot-operations
  labels:
    app.kubernetes.io/component: opcplc-000000
data: {}
---
apiVersion: batch/v1
kind: Job
metadata:
  name: opcplc-000000-execute-mutual-trust
  namespace: azure-iot-operations
  labels:
    app.kubernetes.io/component: opcplc-000000
spec:
  backoffLimit: 1
  template:
    spec:
      containers:
      - name: kubectl
        image: mcr.microsoft.com/oss/kubernetes/kubectl:v1.27.1
        imagePullPolicy: Always
        command: ["/bin/sh"]
        args: ["/scripts/execute-commands.sh"]
        volumeMounts:
        - name: scripts
          mountPath: /scripts
          readOnly: true
      restartPolicy: Never
      serviceAccountName: opcplc-000000-service-account
      volumes:
      - name: scripts
        configMap:
          name: opcplc-000000-execute-commands-script
---
apiVersion: v1
kind: ConfigMap
metadata:
  name: opcplc-000000-execute-commands-script
  namespace: azure-iot-operations
  labels:
    app.kubernetes.io/component: opcplc-000000
data:
  execute-commands.sh: |
    #!/bin/sh

    # wait 20 seconds for the resources to be created
    sleep 20

    # Extract the OPC UA connector application instance certificate and add it to the OPC PLC trust list
    cert=$(kubectl -n azure-iot-operations get secret aio-opc-opcuabroker-default-application-cert -o jsonpath='{.data.tls\.crt}' | base64 -d)
    data=$(kubectl create secret generic temp --from-literal=opcuabroker.crt="$cert" --dry-run=client -o jsonpath='{.data}')
    kubectl patch secret opc-plc-trust-list -n azure-iot-operations -p "{\"data\": $data}"

    # Extract the OPC PLC application instance certificate and add it to the OPC UA connector trust list
    cert=$(kubectl -n azure-iot-operations get secret opc-plc-default-application-cert -o jsonpath='{.data.tls\.crt}' | base64 -d)
    data=$(kubectl create secret generic temp --from-literal=opcplc-000000.crt="$cert" --dry-run=client -o jsonpath='{.data}')
    kubectl patch secret aio-opc-ua-broker-trust-list -n azure-iot-operations -p "{\"data\": $data}"
---
apiVersion: v1
kind: ServiceAccount
metadata:
  name: opcplc-000000-service-account
  namespace: azure-iot-operations
  labels:
    app.kubernetes.io/component: opcplc-000000
---
apiVersion: rbac.authorization.k8s.io/v1
kind: Role
metadata:
  name: opc-plc-000000-secret-access-role
  namespace: azure-iot-operations
rules:
- apiGroups: [""]
  resources: ["secrets"]
  verbs: ["get", "patch"]
---
apiVersion: rbac.authorization.k8s.io/v1
kind: RoleBinding
metadata:
  name: opc-plc-000000-secret-access-rolebinding
  namespace: azure-iot-operations
subjects:
- kind: ServiceAccount
  name: opcplc-000000-service-account
  namespace: azure-iot-operations
roleRef:
  kind: Role
  name: opc-plc-000000-secret-access-role
  apiGroup: rbac.authorization.k8s.io
opcplc-000000-execute-commands-script查看 YAML 文件中的配置,了解 OPC PLC 模拟器与 OPC UA 连接器之间如何建立相互信任。
登录到操作体验
要创建资产终结点、资产和订阅 OPC UA 标记和事件,请使用操作体验。
浏览到浏览器中的操作体验,并使用 Microsoft Entra ID 凭据登录。
选择站点
站点是 Azure IoT 操作实例的集合。 站点通常按物理位置对实例进行分组,以便 OT 用户更轻松地定位和管理资产。 IT 管理员会创建站点并为其分配 Azure IoT 操作实例。 由于你正在使用新部署,因此还没有站点。 可选择“查看未分配的实例”,查找之前创建的群集。 在操作体验中,实例表示在其中部署了 Azure IoT 操作的群集。

选择实例
选择在上一个教程中你将 Azure IoT 操作部署到的实例:
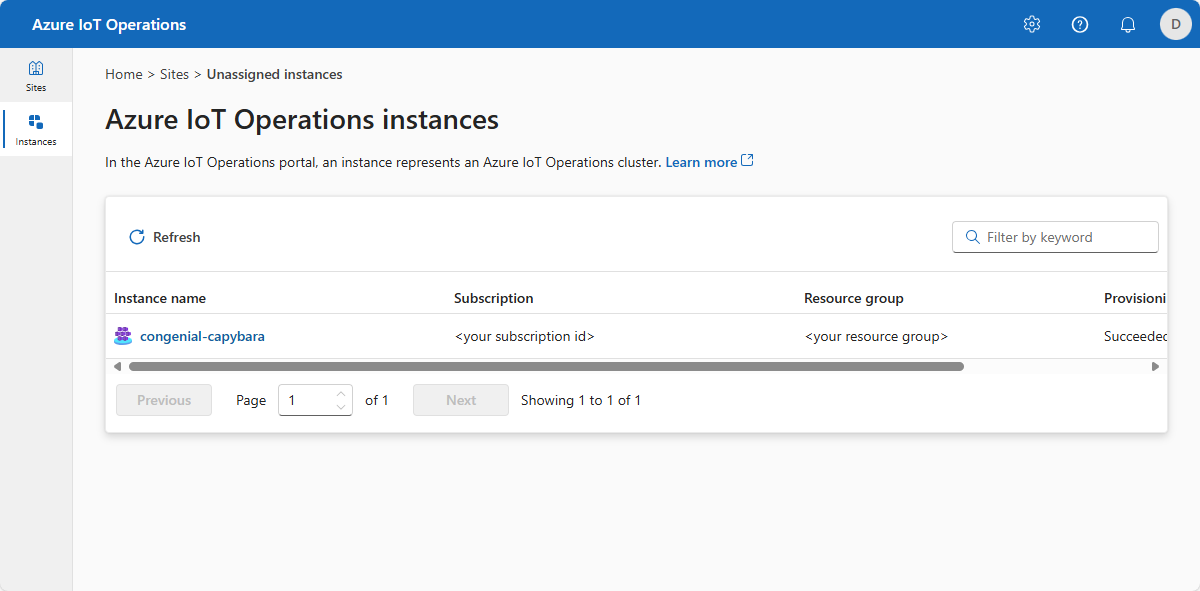
提示
如果没有看到任何实例,则可能不在正确的 Microsoft Entra ID 租户中。 可以在操作体验的右上角菜单中更改租户。
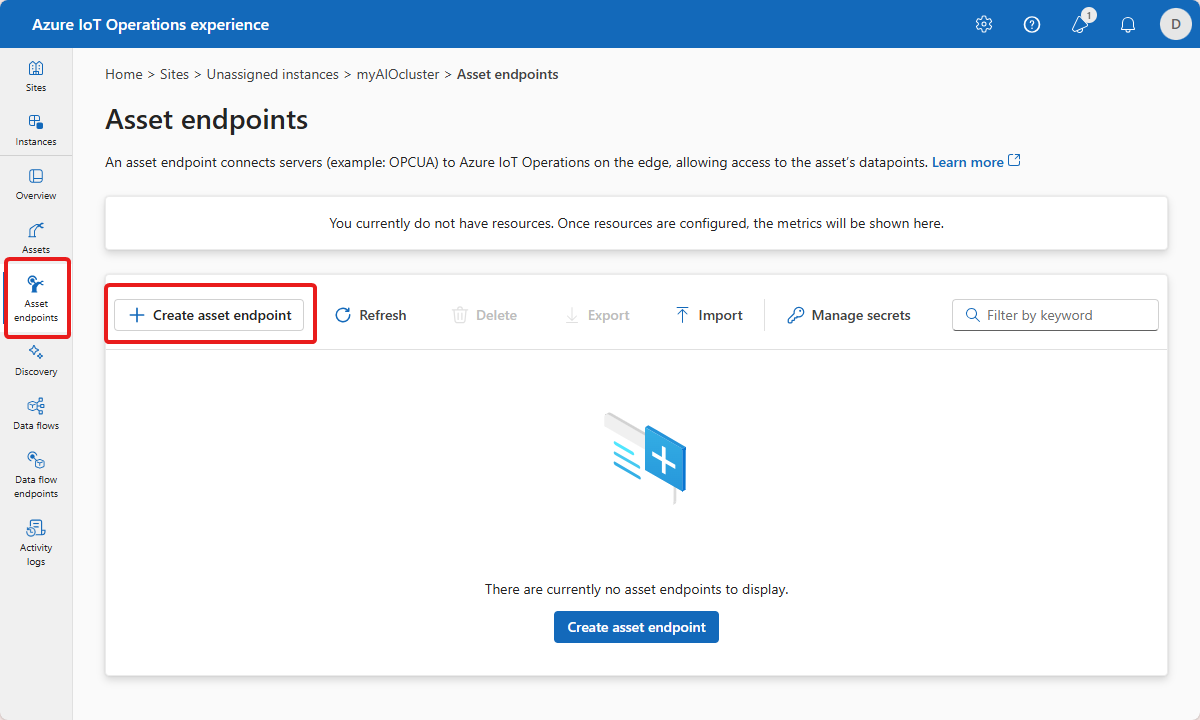
添加资产终结点
在上一篇文章中部署 Azure IoT 操作时,包括了一个内置的 OPC PLC 模拟器。 在此步骤中,你会添加资产终结点,使你能够连接到 OPC PLC 模拟器。
要添加资产终结点:
依次选择“资产终结点”、“创建资产终结点”:
输入以下终结点信息:
字段 值 资产终结点名称 opc-ua-connector-0OPC UA 服务器 URL opc.tcp://opcplc-000000:50000用户身份验证模式 Username password同步的机密名称 plc-credentials
在本教程中,您将通过操作体验 Web UI 向您的 Azure Key Vault 实例添加新的机密。 机密会自动同步到 Kubernetes 群集:
若要添加用户名引用,请选择“ 添加引用”,然后选择 “新建”。
输入
plcusername为机密名称和contosouser机密值。 然后,选择应用。若要添加密码引用,请选择“ 添加引用”,然后选择 “新建”。
输入
plcpassword作为机密名称,输入您添加到 opc-plc-deployment.yaml 文件中的密码作为机密值。 然后,选择应用。若要保存资产终结点定义,请选择“ 创建”。
此配置将调用 opc-ua-connector-0 的新资产终结点部署到群集。 可以在 Azure 门户中查看资产终结点,或者可用于 kubectl 查看 Kubernetes 群集中的资产终结点:
kubectl get assetendpointprofile -n azure-iot-operations
可以在资源组的 Azure Key Vault 实例中查看 plcusername 和 plcpassword 机密。 机密会同步到 Kubernetes 群集,你可以在其中使用 kubectl get secret plc-credentials -n azure-iot-operations 命令查看这些机密。 也可以在操作体验中的“管理已同步的机密”页面上查看机密。
管理资产
在操作体验中选择实例后,可在“资产”页上看到可用资产列表。 如果尚无资产,则此列表为空:
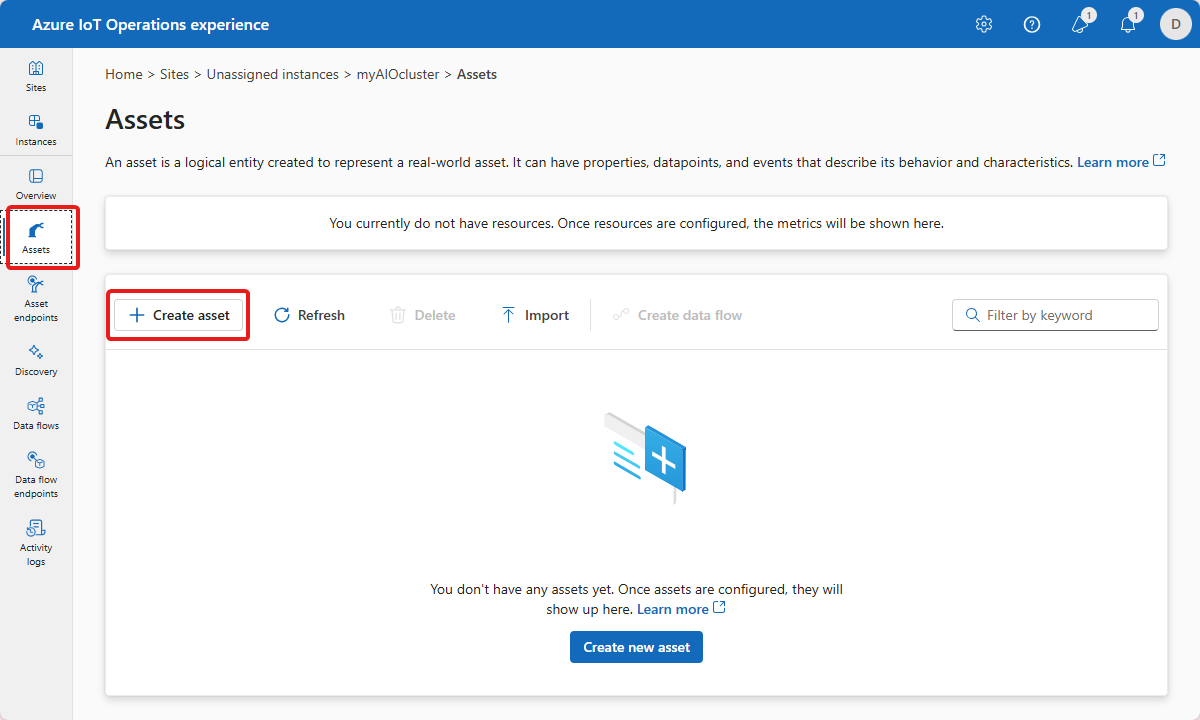
创建资产
要创建资产,请选择“创建资产”。 然后输入以下资产信息:
| 字段 | 值 |
|---|---|
| 资产终结点 | opc-ua-connector-0 |
| 资产名称 | thermostat |
| 说明 | A simulated thermostat asset |
| 默认 MQTT 主题 | azure-iot-operations/data/thermostat |
删除现有自定义属性并添加以下自定义属性。 请小心使用确切的属性名称,因为稍后的教程中的 Power BI 模板会对其进行查询:
| 属性名称 | 属性详细信息 |
|---|---|
| 批处理 | 102 |
| 客户 | Contoso |
| 设备 | 锅炉 |
| isSpare | 是 |
| 位置 | 西雅图 |

选择“下一步”转到“添加标记”页。
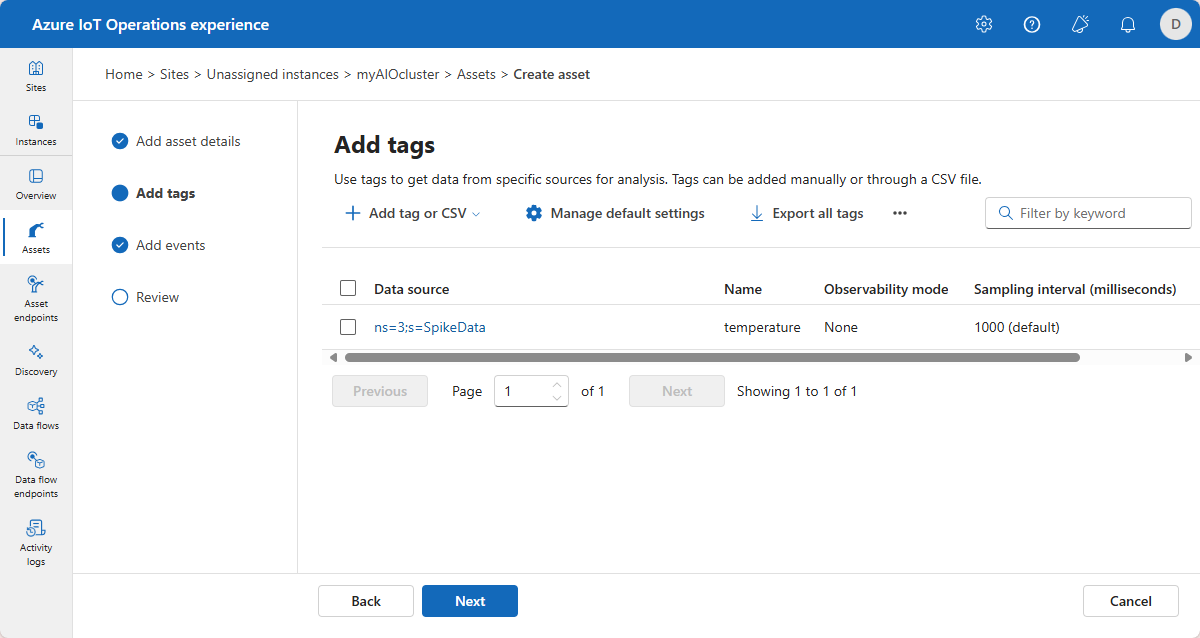
创建 OPC UA 标记
在“添加标记”页上添加两个 OPC UA 标记。 若要添加每个标记,请依次选择“添加标记或 CSV”、“添加标记”。 输入下表中显示的标记详细信息:
| 节点 ID | 标记名称 | 可观测性模式 |
|---|---|---|
| ns=3;s=SpikeData | 温度 | 无 |
此处的节点 ID 特定于 OPC UA 模拟器。 该节点在指定范围内生成随机值,并且还具有间歇性峰值。
“可观测性模式”是以下值之一:None、Gauge、Counter、Histogram 或 Log。
可以选择“管理默认设置”,以更改每个标记的默认采样间隔和队列大小。
选择“下一步”转到“添加事件”页,然后选择“下一步”转到“查看”页。
审阅
在选择“创建”之前,请查看资产和标记详细信息并进行任何调整:

此配置将调用 thermostat 的新资产部署到群集。 可以在 Azure 门户中的资源组中查看资产。 您还可以使用 kubectl 在您的群集上本地查看资产。
kubectl get assets -n azure-iot-operations
在 Azure 门户中查看资源
要查看在 Azure 门户中创建的资产终结点和资产,请转到包含 Azure IoT 操作实例的资源组。 可以在“Azure IoT 操作”资源组中看到恒温器资产。 如果选择“显示隐藏类型”,则还可以看到资产终结点:

通过门户可以查看资产详细信息。 有关更多详细信息,请选择“JSON 视图”:

验证数据是否流动
使用 mosquitto_sub 工具验证数据是否流向 MQTT 代理。 在此示例中,你将在 Kubernetes 群集中运行 mosquitto_sub 工具:
运行以下命令来部署包含 mosquitto_pub 和 mosquitto_sub 工具的 Pod,这些工具可用于与群集中的 MQTT 代理交互:
kubectl apply -f https://raw.githubusercontent.com/Azure-Samples/explore-iot-operations/main/samples/quickstarts/mqtt-client.yaml以下代码片段显示了已应用的 YAML 文件:
# Important: do not use in production environments
# Create a service account
apiVersion: v1
kind: ServiceAccount
metadata:
  name: mqtt-client
  namespace: azure-iot-operations
---
# Creates a pod with mosquitto-clients and mqttui utilities in your cluster
apiVersion: v1
kind: Pod
metadata:
  name: mqtt-client
  # The namespace must match the IoT MQ BrokerListener's namespace
  # Otherwise use the long hostname: aio-broker.azure-iot-operations.svc.cluster.local
  namespace: azure-iot-operations
spec:
  # Use the "mqtt-client" service account which comes with default deployment
  # Otherwise create it with `kubectl create serviceaccount mqtt-client -n azure-iot-operations`
  serviceAccountName: mqtt-client
  containers:
    # Install mosquitto and mqttui utilities on Alpine linux
  - image: alpine
    name: mqtt-client
    command: ["sh", "-c"]
    args: ["apk add mosquitto-clients mqttui && sleep infinity"]
    resources:
      limits:
        cpu: 500m
        memory: 200Mi
      requests:
        cpu: 100m
        memory: 100Mi
    volumeMounts:
    - name: broker-sat
      mountPath: /var/run/secrets/tokens
    - name: trust-bundle
      mountPath: /var/run/certs
  volumes:
  - name: broker-sat
    projected:
      sources:
      - serviceAccountToken:
          path: broker-sat
          audience: aio-internal # Must match audience in BrokerAuthentication
          expirationSeconds: 86400
  - name: trust-bundle
    configMap:
      name: azure-iot-operations-aio-ca-trust-bundle # Default root CA cert
注意
此配置是不安全的。 请勿在生产环境中使用此配置。
运行 mqtt-client pod 时,请运行以下命令以在所创建的 Pod 中创建 shell 环境:
kubectl exec --stdin --tty mqtt-client -n azure-iot-operations -- sh在 mqtt-client pod 中的 Bash shell 中,运行以下命令,使用订阅 主题的 mosquitto_sub
data/thermostat工具连接到 MQTT 代理:mosquitto_sub --host aio-broker --port 18883 --topic "azure-iot-operations/data/#" -v --debug --cafile /var/run/certs/ca.crt -D CONNECT authentication-method 'K8S-SAT' -D CONNECT authentication-data $(cat /var/run/secrets/tokens/broker-sat)此命令在到达
data/thermostat主题时会继续运行并显示消息,直到按 Ctrl+C 停止它。 要退出 shell 环境,请键入exit。
若要验证添加的恒温器资产是否发布数据,请查看主题中的 azure-iot-operations/data 消息:
Client $server-generated/0000aaaa-11bb-cccc-dd22-eeeeee333333 received PUBLISH (d0, q0, r0, m0, 'azure-iot-operations/data/thermostat', ... (92 bytes))
azure-iot-operations/data/thermostat {"temperature":{"SourceTimestamp":"2025-02-14T11:27:44.5030912Z","Value":48.17536741017152}}
Client $server-generated/0000aaaa-11bb-cccc-dd22-eeeeee333333 received PUBLISH (d0, q0, r0, m0, 'azure-iot-operations/data/thermostat', ... (90 bytes))
azure-iot-operations/data/thermostat {"temperature":{"SourceTimestamp":"2025-02-14T11:27:45.50333Z","Value":98.22872507286887}}
Client $server-generated/0000aaaa-11bb-cccc-dd22-eeeeee333333 received PUBLISH (d0, q0, r0, m0, 'azure-iot-operations/data/thermostat', ... (92 bytes))
azure-iot-operations/data/thermostat {"temperature":{"SourceTimestamp":"2025-02-14T11:27:46.503381Z","Value":12.533323356430426}}
如果没有数据流,请重启 aio-opc-opc.tcp-1 Pod:
使用以下命令查找
aio-opc-opc.tcp-1Pod 的名称:kubectl get pods -n azure-iot-operationsPod 的名称类似于
aio-opc-opc.tcp-1-849dd78866-vhmz6。使用类似于以下示例的命令重启
aio-opc-opc.tcp-1Pod。 使用上一步中的aio-opc-opc.tcp-1Pod 名称:kubectl delete pod aio-opc-opc.tcp-1-849dd78866-vhmz6 -n azure-iot-operations
在之前的教程中添加的示例标记从资产生成类似于以下示例的消息:
{
    "temperature":{
        "Value":24.86898871648548,
        "SourceTimestamp":"2025-04-25T14:50:07.195274Z"
    }
}
我们如何解决问题?
在本教程中,你添加了资产终结点,然后定义了资产和标记。 资产和标记对来自 OPC UA 服务器的数据进行建模,使数据更易于在 MQTT 代理和其他下游流程中使用。
你使用存储在 Azure Key Vault 中的凭据向 OPC UA 服务器进行身份验证。 此方法比资产定义中的硬编码凭据更安全。
使用你在下一个教程中定义的恒温器资产。
清理资源
如果继续学习下一教程,请保留所有资源。
如果要移除 Azure IoT 操作部署但保留群集,请使用 az iot ops delete 命令:
az iot ops delete --cluster $CLUSTER_NAME --resource-group $RESOURCE_GROUP
如果要删除为此快速入门创建的所有资源,请删除部署 Azure IoT 操作的 Kubernetes 群集,然后移除包含该群集的 Azure 资源组。
如果使用了 Codespaces 来完成这些快速入门,请从 GitHub 中删除你的 Codespace。