このセクションでは、Xamarin.iOS アプリケーションでローカル通知を使用する方法について説明します。 アプリで受信したときにアラートをポップアップ表示する通知の作成と発行の基本について説明します。
重要
このセクションの情報は iOS 9 以前に関連しており、以前の iOS バージョンをサポートするために残されています。 iOS 10 以降については、iOS デバイスでローカルとリモート両方の通知をサポートするためのユーザー通知フレームワーク ガイドを参照してください。
チュートリアル
ローカル通知を実際に表示する単純なアプリケーションを作成しましょう。 このアプリケーションにはボタンが 1 つ表示されます。 ボタンを選択すると、ローカル通知が作成されます。 指定した期間が経過すると、通知が表示されます。
Visual Studio for Mac で、新しい単一ビューの iOS ソリューションを作成して、
Notificationsという名前を付けます。Main.storyboardファイルを開き、ボタンをビューにドラッグします。 ボタンに button という名前を付け、タイトルとして [通知の追加] を付けます。 この時点で、ボタンにいくつかの制約を設定することもできます。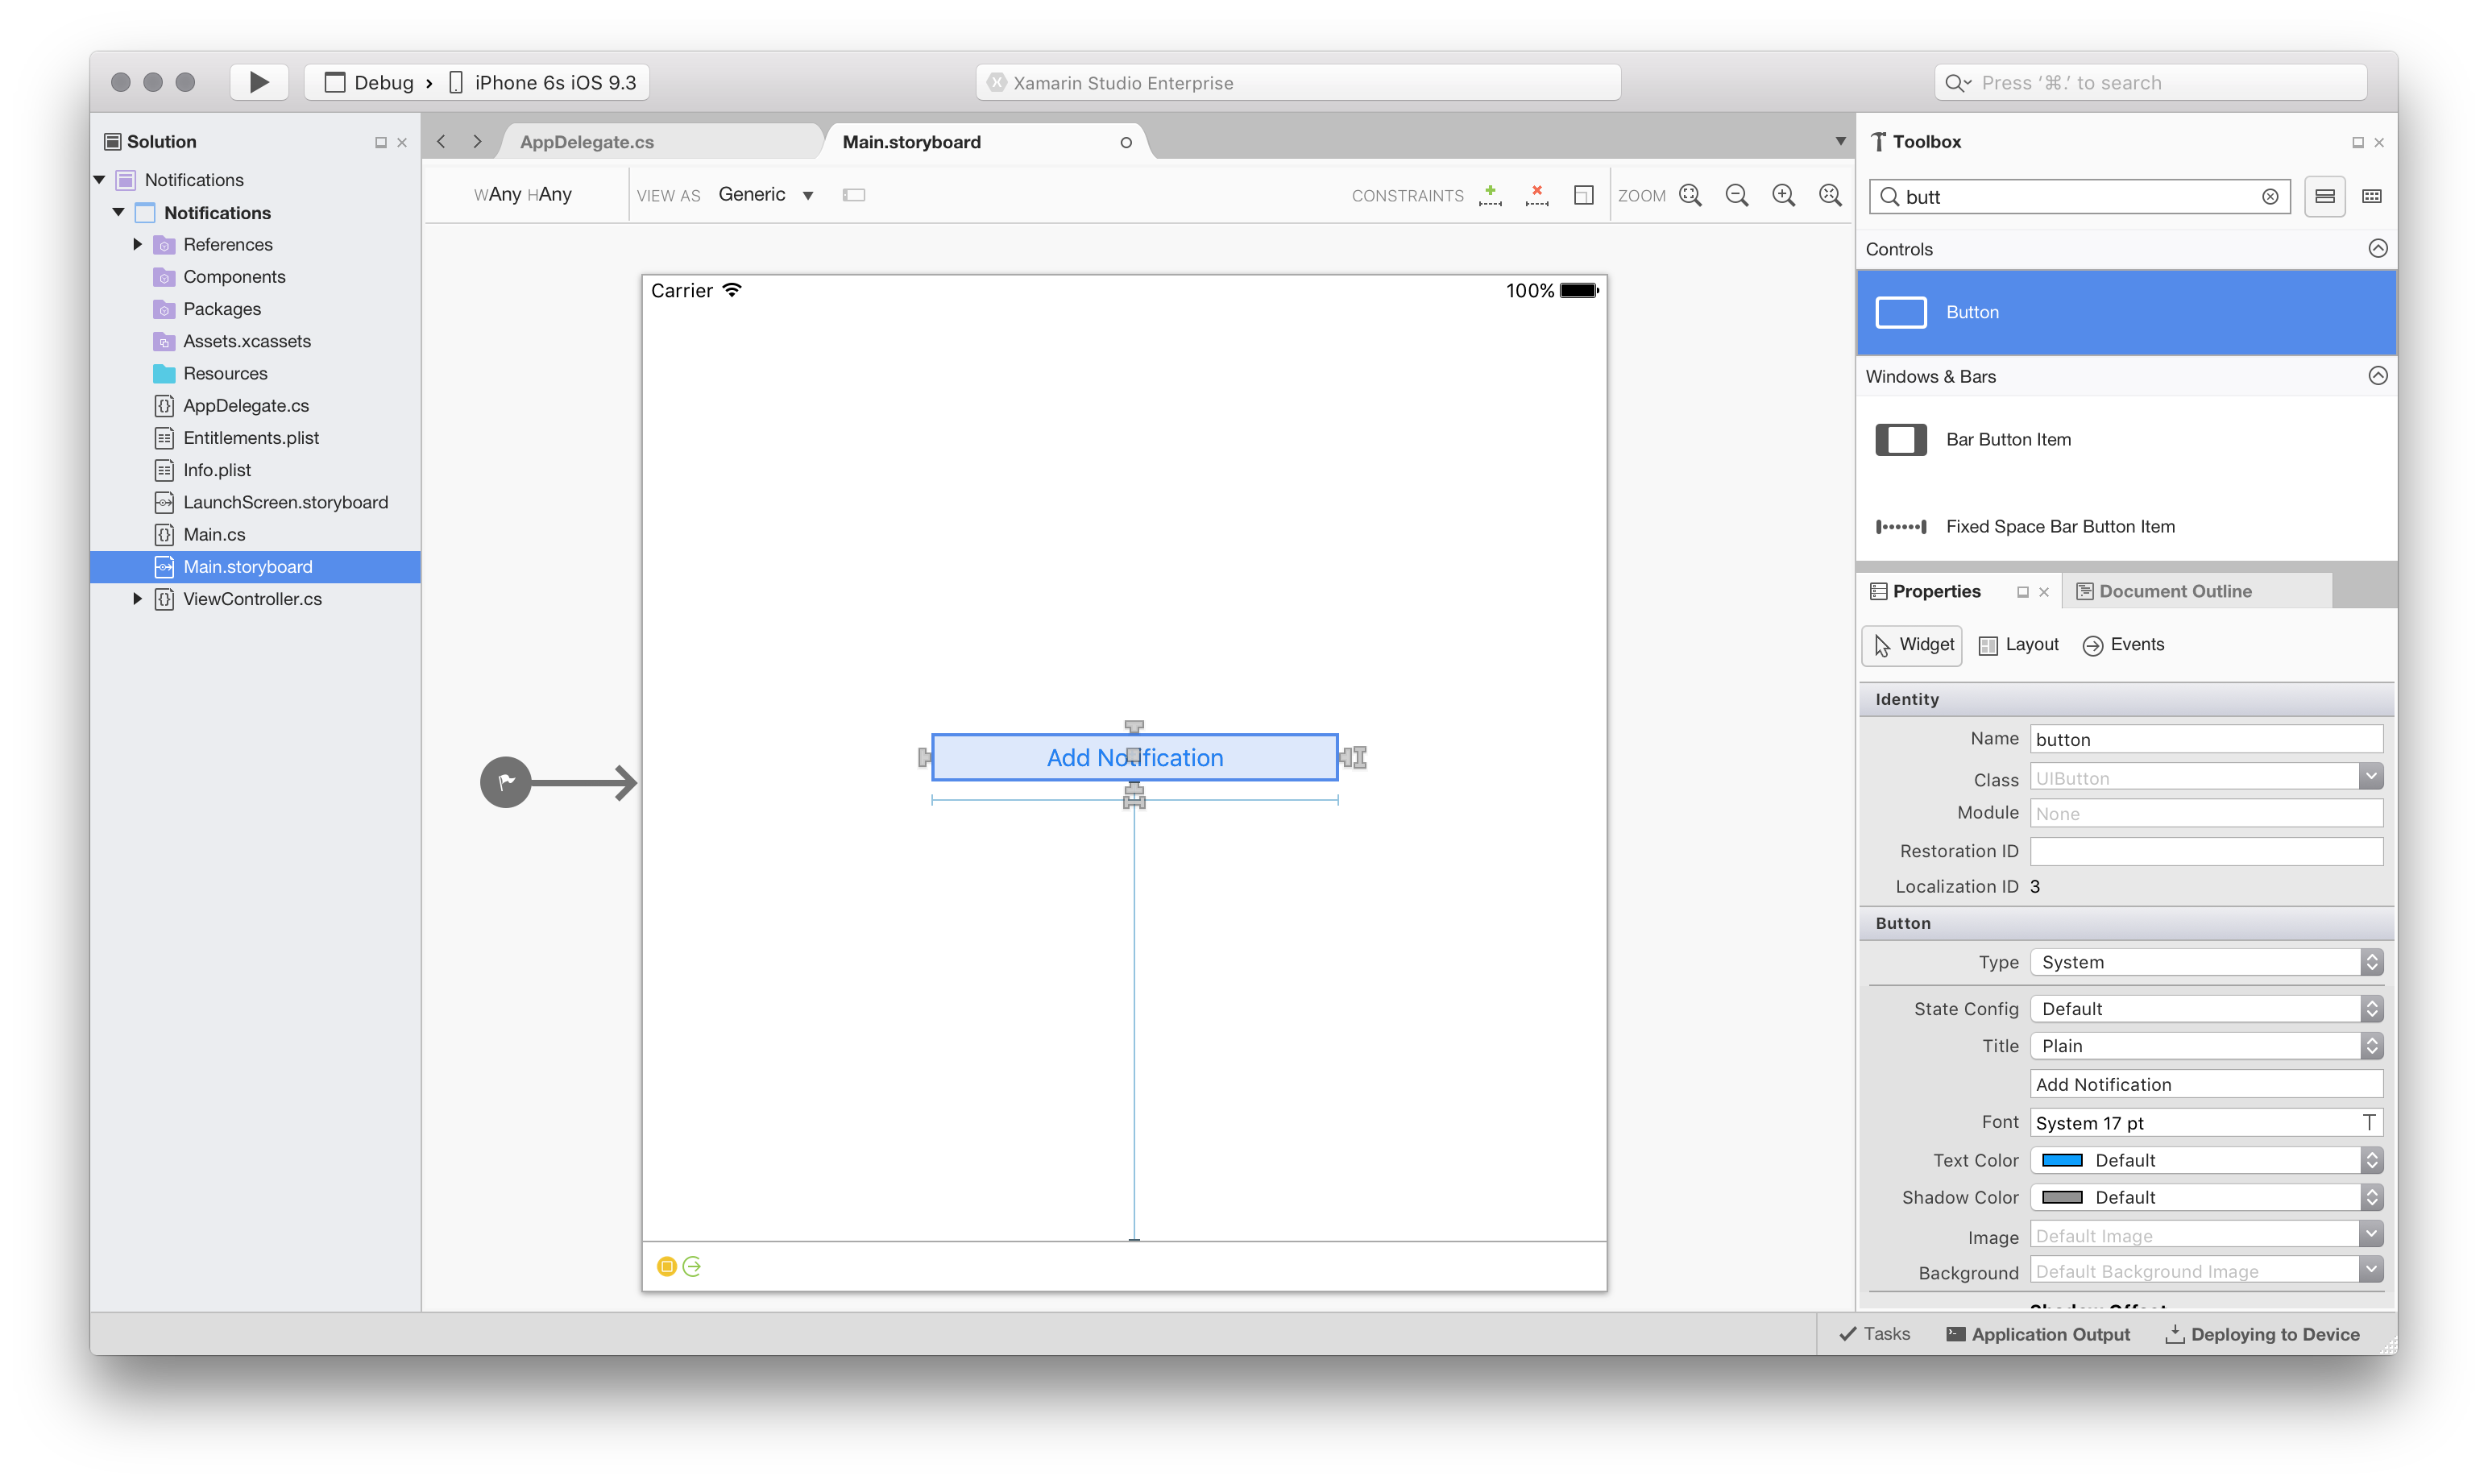
ViewControllerクラスを編集し、次のイベント ハンドラーを ViewDidLoad メソッドに追加します。button.TouchUpInside += (sender, e) => { // create the notification var notification = new UILocalNotification(); // set the fire date (the date time in which it will fire) notification.FireDate = NSDate.FromTimeIntervalSinceNow(60); // configure the alert notification.AlertAction = "View Alert"; notification.AlertBody = "Your one minute alert has fired!"; // modify the badge notification.ApplicationIconBadgeNumber = 1; // set the sound to be the default sound notification.SoundName = UILocalNotification.DefaultSoundName; // schedule it UIApplication.SharedApplication.ScheduleLocalNotification(notification); };このコードでは、サウンドを使用し、アイコン バッジの値を 1 に設定し、ユーザーにアラートを表示する通知を作成します。
次にファイル
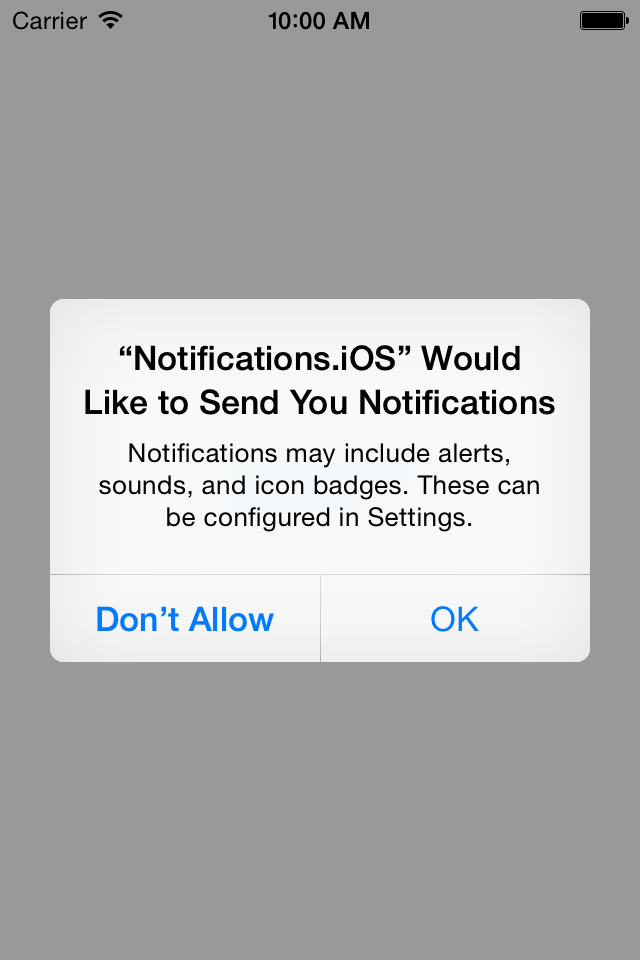
AppDelegate.csを編集し、まず次のコードをFinishedLaunchingメソッドに追加します。 デバイスが iOS 8 を実行しているかどうかを確認しました。している場合は、通知を受信するためのユーザーのアクセス許可を要求する必要があります。if (UIDevice.CurrentDevice.CheckSystemVersion (8, 0)) { var notificationSettings = UIUserNotificationSettings.GetSettingsForTypes ( UIUserNotificationType.Alert | UIUserNotificationType.Badge | UIUserNotificationType.Sound, null ); application.RegisterUserNotificationSettings (notificationSettings); }引き続き
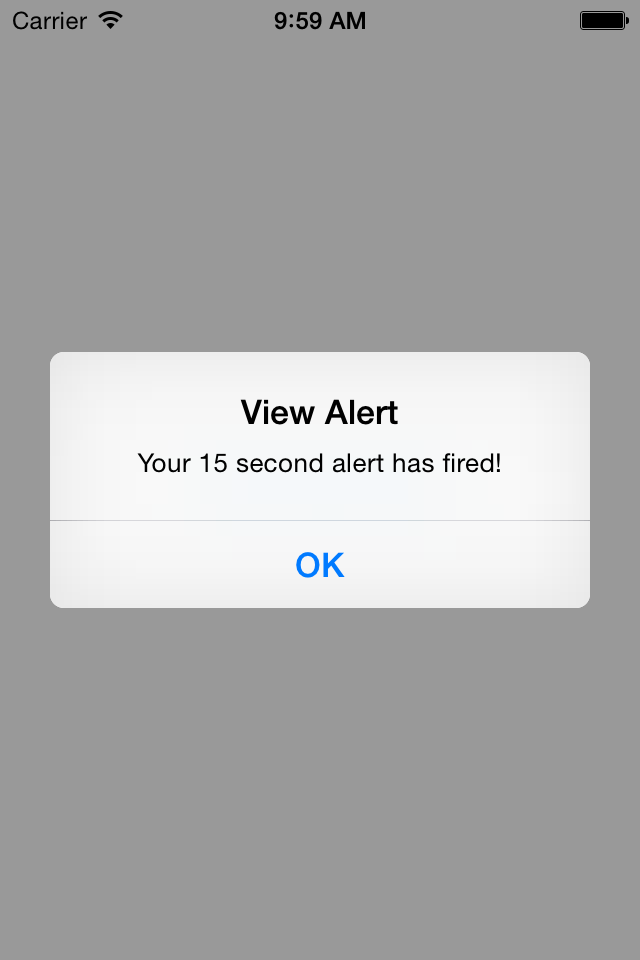
AppDelegate.csで、通知を受信したときに呼び出される次のメソッドを追加します。public override void ReceivedLocalNotification(UIApplication application, UILocalNotification notification) { // show an alert UIAlertController okayAlertController = UIAlertController.Create(notification.AlertAction, notification.AlertBody, UIAlertControllerStyle.Alert); okayAlertController.AddAction(UIAlertAction.Create("OK", UIAlertActionStyle.Default, null)); UIApplication.SharedApplication.KeyWindow.RootViewController.PresentViewController(okayAlertController, true, null); // reset our badge UIApplication.SharedApplication.ApplicationIconBadgeNumber = 0; }ローカル通知のために通知が起動されたケースを処理する必要があります。
AppDelegateでメソッドFinishedLaunchingを編集して、次のコード スニペットを含めます。// check for a notification if (launchOptions != null) { // check for a local notification if (launchOptions.ContainsKey(UIApplication.LaunchOptionsLocalNotificationKey)) { var localNotification = launchOptions[UIApplication.LaunchOptionsLocalNotificationKey] as UILocalNotification; if (localNotification != null) { UIAlertController okayAlertController = UIAlertController.Create(localNotification.AlertAction, localNotification.AlertBody, UIAlertControllerStyle.Alert); okayAlertController.AddAction(UIAlertAction.Create("OK", UIAlertActionStyle.Default, null)); Window.RootViewController.PresentViewController(okayAlertController, true, null); // reset our badge UIApplication.SharedApplication.ApplicationIconBadgeNumber = 0; } } }最後に、アプリケーションを実行します。 iOS 8 では、通知を許可するように求められます。 [OK] を選択し、[通知の追加] ボタンを選択します。 しばらくすると、次のスクリーンショットに示すように、アラート ダイアログが表示されます。
![[通知の追加] ボタン](local-notifications-in-ios-walkthrough-images/image1.png)
まとめ
このチュートリアルでは、iOS で通知を作成および発行するためにさまざまな API を使用する方法について説明しました。 また、アプリケーション アイコンをバッジで更新して、アプリケーション固有のフィードバックをユーザーに提供する方法についても説明しました。