Exercise - Add a test stage to your pipeline
Your toy company's security team has asked you to verify that your website is accessible only through HTTPS. In this exercise, you'll configure your pipeline to run a smoke test that checks whether the security team's requirement is met.
During the process, you'll:
- Add a test script to your repository.
- Update your pipeline definition to add a test stage.
- Run the pipeline and observe the test fail.
- Fix the Bicep file and observe the pipeline run successfully.
Add a test script
First, you'll add a test script to verify that the website is accessible when HTTPS is used and not accessible when the nonsecure HTTP protocol is used.
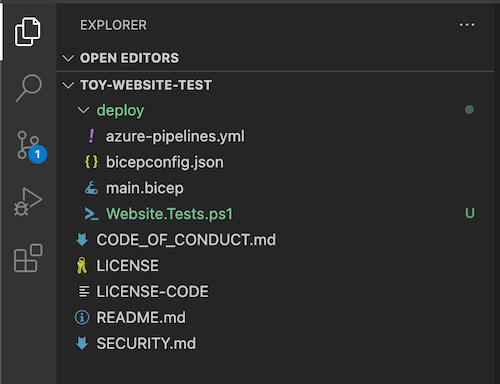
In Visual Studio Code, create a new file in the deploy folder. Name the file Website.Tests.ps1.
Paste the following test code into the file:
param(
  [Parameter(Mandatory)]
  [ValidateNotNullOrEmpty()]
  [string] $HostName
)

Describe 'Toy Website' {

    It 'Serves pages over HTTPS' {
      $request = [System.Net.WebRequest]::Create("https://$HostName/")
      $request.AllowAutoRedirect = $false
      $request.GetResponse().StatusCode |
        Should -Be 200 -Because "the website requires HTTPS"
    }

    It 'Does not serves pages over HTTP' {
      $request = [System.Net.WebRequest]::Create("http://$HostName/")
      $request.AllowAutoRedirect = $false
      $request.GetResponse().StatusCode |
        Should -BeGreaterOrEqual 300 -Because "HTTP is not secure"
    }

}
This code is a Pester test file. It requires a parameter named
$HostName. It runs two tests against the host name:- Try to connect to the website over HTTPS. The test passes if the server responds with an HTTP response status code that's between 200 and 299, which indicates a successful connection.
- Try to connect to the website over HTTP. The test passes if the server responds with an HTTP response status code of 300 or higher.
For the purposes of this exercise, you don't need to understand the details of the test file and how it works. If your'e interested, you can learn more by checking out the resource listed in the module summary.
Publish your Bicep file's output as a stage output variable
The test script that you created in the preceding steps requires a host name to test. Your Bicep file already includes an output, but before you can use it in your smoke tests, you need to publish it as a stage output variable.
In Visual Studio Code, open the azure-pipelines.yml file in the deploy folder.
In the Deploy stage, update the deployment step to publish the outputs to a variable:
name: DeployBicepFile
displayName: Deploy Bicep file
inputs:
  connectedServiceName: $(ServiceConnectionName)
  deploymentName: $(Build.BuildNumber)
  ___location: $(deploymentDefaultLocation)
  resourceGroupName: $(ResourceGroupName)
  csmFile: deploy/main.bicep
  overrideParameters: >
    -environmentType $(EnvironmentType)
  deploymentOutputs: deploymentOutputs
Your deployment process still uses the same task as it did previously, but the outputs from the deployments are now stored in a pipeline variable named
deploymentOutputs. The output variable is formatted as JSON.To convert the JSON-formatted outputs into pipeline variables, add the following script step below the deployment step:
  echo "##vso[task.setvariable variable=appServiceAppHostName;isOutput=true]$(echo $DEPLOYMENT_OUTPUTS | jq -r '.appServiceAppHostName.value')"
name: SaveDeploymentOutputs
displayName: Save deployment outputs into variables
env:
  DEPLOYMENT_OUTPUTS: $(deploymentOutputs)
If the deployment completes successfully, the script accesses the value of each output from the Bicep deployment. The script uses the
jqtool to access the relevant part of the JSON output. The value is then published to a stage output variable that has the same name as the Bicep deployment output.Note
Pester and jq are both preinstalled on Microsoft-hosted agents for Azure Pipelines. You don't need to do anything special to use them in a script step.
Save the file.
Add a smoke test stage to your pipeline
You can now add a smoke test stage that runs your tests.
At the bottom of the file, add the following definition for the SmokeTest stage:
jobs:
- job: SmokeTest
  displayName: Smoke test
  variables:
    appServiceAppHostName: $[ stageDependencies.Deploy.DeployWebsite.outputs['DeployWebsite.SaveDeploymentOutputs.appServiceAppHostName'] ]
  steps:
This code defines the stage and a job. It also creates a variable in the job named
appServiceAppHostName. This variable takes its value from the output variable that you created in the preceding section.At the bottom of the file, add the following step definition to the SmokeTest stage:
- task: PowerShell@2
  name: RunSmokeTests
  displayName: Run smoke tests
  inputs:
    targetType: inline
    script: |
      $container = New-PesterContainer `
        -Path 'deploy/Website.Tests.ps1' `
        -Data @{ HostName = '$(appServiceAppHostName)' }
      Invoke-Pester `
        -Container $container `
        -CI
This step runs a PowerShell script to run the test script that you wrote earlier by using the Pester testing tool.
At the bottom of the file, add the following step definition to the SmokeTest stage:
name: PublishTestResults
displayName: Publish test results
condition: always()
inputs:
  testResultsFormat: NUnit
  testResultsFiles: 'testResults.xml'
This step takes the test results file that Pester creates and publishes it as pipeline test results. You'll see how the results are displayed soon.
Notice that the step definition includes
condition: always(). This condition indicates to Azure Pipelines that it should always publish the test results, even if the preceding step fails. This condition is important because any failed test will cause the test step to fail, and normally the pipeline stops running after a failed step.Save the file.
Verify and commit your pipeline definition
Verify that your azure-pipelines.yml file looks like the following code:
trigger:
  batch: true
  branches:
    include:
    - main

pool: Dafault

variables:
  - name: deploymentDefaultLocation
    value: westus3

stages:

- stage: Lint
  jobs:
  - job: LintCode
    displayName: Lint code
    steps:
      - script: |
          az bicep build --file deploy/main.bicep
        name: LintBicepCode
        displayName: Run Bicep linter

- stage: Validate
  jobs:
  - job: ValidateBicepCode
    displayName: Validate Bicep code
    steps:
      - task: AzureResourceManagerTemplateDeployment@3
        name: RunPreflightValidation
        displayName: Run preflight validation
        inputs:
          connectedServiceName: $(ServiceConnectionName)
          ___location: $(deploymentDefaultLocation)
          deploymentMode: Validation
          resourceGroupName: $(ResourceGroupName)
          csmFile: deploy/main.bicep
          overrideParameters: >
            -environmentType $(EnvironmentType)

- stage: Preview
  jobs:
  - job: PreviewAzureChanges
    displayName: Preview Azure changes
    steps:
      - task: AzureCLI@2
        name: RunWhatIf
        displayName: Run what-if
        inputs:
          azureSubscription: $(ServiceConnectionName)
          scriptType: 'bash'
          scriptLocation: 'inlineScript'
          inlineScript: |
            az deployment group what-if \
              --resource-group $(ResourceGroupName) \
              --template-file deploy/main.bicep \
              --parameters environmentType=$(EnvironmentType)

- stage: Deploy
  jobs:
  - deployment: DeployWebsite
    displayName: Deploy website
    environment: Website
    strategy:
      runOnce:
        deploy:
          steps:
            - checkout: self
            - task: AzureResourceManagerTemplateDeployment@3
              name: DeployBicepFile
              displayName: Deploy Bicep file
              inputs:
                connectedServiceName: $(ServiceConnectionName)
                deploymentName: $(Build.BuildNumber)
                ___location: $(deploymentDefaultLocation)
                resourceGroupName: $(ResourceGroupName)
                csmFile: deploy/main.bicep
                overrideParameters: >
                  -environmentType $(EnvironmentType)
                deploymentOutputs: deploymentOutputs

            - bash: |
                echo "##vso[task.setvariable variable=appServiceAppHostName;isOutput=true]$(echo $DEPLOYMENT_OUTPUTS | jq -r '.appServiceAppHostName.value')"
              name: SaveDeploymentOutputs
              displayName: Save deployment outputs into variables
              env:
                DEPLOYMENT_OUTPUTS: $(deploymentOutputs)

- stage: SmokeTest
  jobs:
  - job: SmokeTest
    displayName: Smoke test
    variables:
      appServiceAppHostName: $[ stageDependencies.Deploy.DeployWebsite.outputs['DeployWebsite.SaveDeploymentOutputs.appServiceAppHostName'] ]
    steps:
      - task: PowerShell@2
        name: RunSmokeTests
        displayName: Run smoke tests
        inputs:
          targetType: inline
          script: |
            $container = New-PesterContainer `
              -Path 'deploy/Website.Tests.ps1' `
              -Data @{ HostName = '$(appServiceAppHostName)' }
            Invoke-Pester `
              -Container $container `
              -CI

      - task: PublishTestResults@2
        name: PublishTestResults
        displayName: Publish test results
        condition: always()
        inputs:
          testResultsFormat: NUnit
          testResultsFiles: 'testResults.xml'
If you file doesn't look the same, update it to match this example, and then save it.
Commit and push your changes to your Git repository by running the following commands in the Visual Studio Code terminal:
git add .
git commit -m "Add test stage"
git push
Run the pipeline and review the test result
In Azure DevOps, go to your pipeline.
Select the most recent run of your pipeline.
Wait until the pipeline completes the Lint, Validate, and Preview stages. Although Azure Pipelines automatically updates the page with the latest status, it's a good idea to refresh the page occasionally.
Select the Review button and then select Approve.
Wait for the pipeline run to finish.
Notice that the Deploy stage finishes successfully. The SmokeTest stage finishes with an error.

Select the Tests tab.

Notice that the test summary shows that two tests ran. One passed and one failed. The test that failed is listed as Toy Website.Does not serve pages over HTTP.

This text indicates that the website isn't correctly configured to meet your security team's requirement.

Update the Bicep file
Now that you know that your Bicep definition doesn't meet your security team's requirement, you'll fix it.
In Visual Studio Code, open the main.bicep file in the deploy folder.
Find the definition for the Azure App Service app, and update it to include the
httpsOnlyproperty in itspropertiessection:resource appServiceApp 'Microsoft.Web/sites@2022-03-01' = { name: appServiceAppName ___location: ___location properties: { serverFarmId: appServicePlan.id httpsOnly: true siteConfig: { appSettings: [ { name: 'APPINSIGHTS_INSTRUMENTATIONKEY' value: applicationInsights.properties.InstrumentationKey } { name: 'APPLICATIONINSIGHTS_CONNECTION_STRING' value: applicationInsights.properties.ConnectionString } ] } } }Save the file.
Commit and push your changes to your Git repository by running the following commands in the Visual Studio Code terminal:
git add .
git commit -m "Configure HTTPS on website"
git push
Run the pipeline again
In your browser, go to your pipeline.
Select the most recent run.
Wait until the pipeline completes the Lint, Validate, and Preview stages. Although Azure Pipelines automatically updates the page with the latest status, it's a good idea to refresh the page occasionally.
Select the Preview stage and review the what-if results again.
Notice that the what-if command has detected the change in the
httpsOnlyproperty's value:Resource and property changes are indicated with these symbols: + Create ~ Modify = Nochange The deployment will update the following scope: Scope: /subscriptions/aaaa0a0a-bb1b-cc2c-dd3d-eeeeee4e4e4e/resourceGroups/ToyWebsiteTest ~ Microsoft.Web/sites/toy-website-nbfnedv766snk [2021-01-15] + properties.siteConfig.localMySqlEnabled: false + properties.siteConfig.netFrameworkVersion: "v4.6" ~ properties.httpsOnly: false => true = Microsoft.Insights/components/toywebsite [2020-02-02] = Microsoft.Storage/storageAccounts/mystoragenbfnedv766snk [2021-04-01] = Microsoft.Web/serverfarms/toy-website [2021-01-15] Resource changes: 1 to modify, 3 no change.Go back to the pipeline run.
Select the Review button, and then select Approve.
Wait for the pipeline run to finish.
Notice that the entire pipeline finishes successfully, including the SmokeTest stage. This result indicates that both tests passed.


Clean up the resources
Now that you've completed the exercise, you can remove the resources so you aren't billed for them.
In the Visual Studio Code terminal, run the following command:
az group delete --resource-group ToyWebsiteTest --yes --no-wait
The resource group is deleted in the background.
Remove-AzResourceGroup -Name ToyWebsiteTest -Force