Note
Access to this page requires authorization. You can try signing in or changing directories.
Access to this page requires authorization. You can try changing directories.
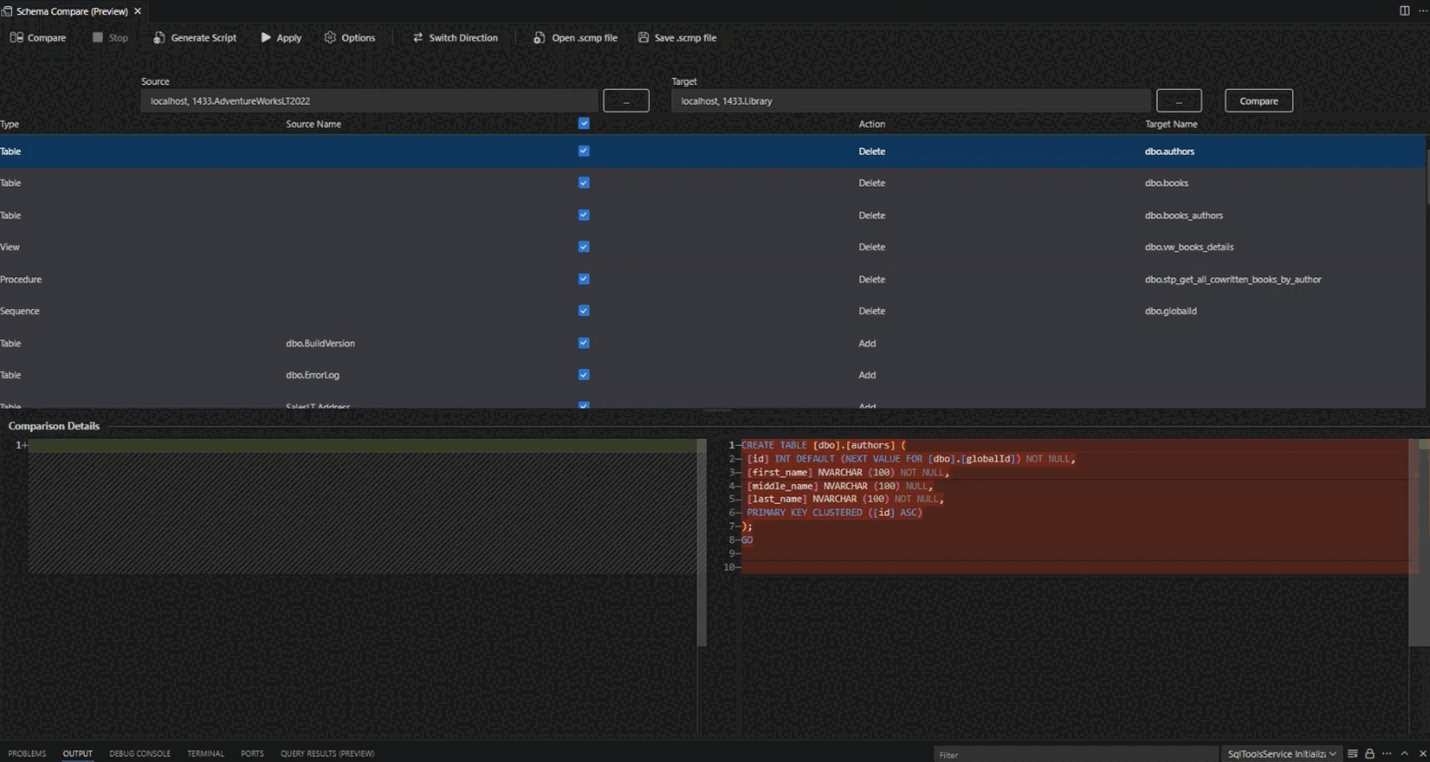
This article provides an overview of the Schema Compare feature for the MSSQL extension in Visual Studio Code. Schema Compare compares two database definitions, and applies the differences from the source to the target, including active database connections, .dacpac files, and SQL projects.
Schema Compare simplifies the process of comparing databases, and gives you full control when synchronizing them, even across different database versions. You can selectively filter specific differences, and categories of differences, before applying any changes.
Features
Schema Compare provides the following features:
- Compare schemas between two
.dacpacfiles, databases, or SQL projects. - View results as a set of actions to match a target against the source.
- Selectively exclude actions listed in results.
- Set options that control the scope of the comparison.
- Apply changes directly to the target, or generate a script to apply changes at a later time.
- Save the comparison.

Note
All features of Schema Compare are available in the preview version. You can provide feedback through GitHub.
Install the MSSQL extension
To user the Schema Compare features, install the MSSQL extension for Visual Studio Code:
In Visual Studio Code, select the Extensions icon to view available extensions.

Search for the SQL Server (mssql) extension and select it to view its details. Select Install to add the extension.
Once installed, Reload to enable the extension in Visual Studio Code (only required when installing an extension for the first time).
Compare schemas
To compare schemas, open the Schema Compare dialog box. To do so, follow these steps:
To open the Schema Compare dialog box, right-click a database in Object Explorer and select Schema Compare. The database you select is set as the Source database in the comparison.

Select one of the ellipses (...) to change the Source and Target of your Schema Compare and select OK.

To customize your comparison, select the Options button in the toolbar.

Select Compare to view the results of the comparison.


Apply changes
Navigate through the object list, and ensure that you select the objects you would like to apply changes to.
Apply the changes to your target.


