Note
Access to this page requires authorization. You can try signing in or changing directories.
Access to this page requires authorization. You can try changing directories.
This tutorial walks you through the process of deploying WebLogic Server (WLS) with Azure Application Gateway.

Load balancing is an essential part of migrating your Oracle WebLogic Server cluster to Azure. The easiest solution is to use the built-in support for Azure Application Gateway. App Gateway is included as part of the WebLogic Cluster support on Azure. For an overview of WebLogic Cluster support on Azure, see What is Oracle WebLogic Server on Azure?.
In this tutorial, you learn how to:
- Choose how to provide the TLS/SSL certificate to the App Gateway
- Deploy WebLogic Server with Azure Application Gateway to Azure
- Validate successful deployment of WLS and App Gateway
Prerequisites
OpenSSL on a computer running a UNIX-like command-line environment.
Even though there could be other tools available for certificate management, this tutorial uses OpenSSL. You can find OpenSSL bundled with many GNU/Linux distributions, such as Ubuntu.
An active Azure subscription.
- If you don't have an Azure subscription, create a free account.
The ability to deploy the WebLogic Server configured cluster on Azure VMs offer described in What are solutions for running Oracle WebLogic Server on Azure Virtual Machines? The other virtual machine (VM) offers don't support automatic integration of Azure Application Gateway. The steps in this article only apply to offers that support automatic integration of Azure Application Gateway.
Note
The WLS on Azure Kubernetes Service (AKS) offer has full support for Azure Application Gateway. For more information, see Deploy a Java application with WebLogic Server on an Azure Kubernetes Service (AKS) cluster.
Migration context
Here are some things to consider about migrating on-premises WLS installations and Azure Application Gateway. Even though the steps of this tutorial are the easiest way to stand up a load-balancer in front of your WLS Cluster on Azure, there are many other ways to do it. This list shows some other things to consider.
- If you have an existing load-balancing solution, ensure that Azure Application Gateway meets or exceeds its capabilities. For a summary of the capabilities of Azure Application Gateway compared to other Azure load-balancing solutions, see Overview of load-balancing options in Azure.
- If your existing load-balancing solution provides security protection from common exploits and vulnerabilities, Application Gateway meets your needs. Application Gateway's built-in Web Application Firewall (WAF) implements the OWASP (Open Web Application Security Project) core rule sets. For more information on WAF support in Application Gateway, see the Web Application Firewall section of Azure Application Gateway features.
- If your existing load-balancing solution requires end-to-end TLS/SSL encryption, you need to do more configuration after following the steps in this guide. See the End-to-end TLS encryption section of Overview of TLS termination and end to end TLS with Application Gateway and the Oracle documentation on Configuring SSL in Oracle Fusion Middleware.
- If you're optimizing for the cloud, this guide shows you how to start from scratch with Azure App Gateway and WLS.
- For a comprehensive survey of migrating WebLogic Server to Azure Virtual Machines, see Migrate WebLogic Server applications to Azure Virtual Machines.
Deploy WebLogic Server with Application Gateway to Azure
This section shows you how to provision a WLS cluster with Azure Application Gateway automatically created as the load balancer for the cluster nodes. Application Gateway uses the provided TLS/SSL certificate for TLS/SSL termination. For advanced details on TLS/SSL termination with Application Gateway, see Overview of TLS termination and end to end TLS with Application Gateway.
To create the WLS cluster and Application Gateway, use the following steps.
Begin the process of deploying a WLS configured cluster as described in the Oracle documentation, but come back to this page when you reach Azure Application Gateway, as shown here.
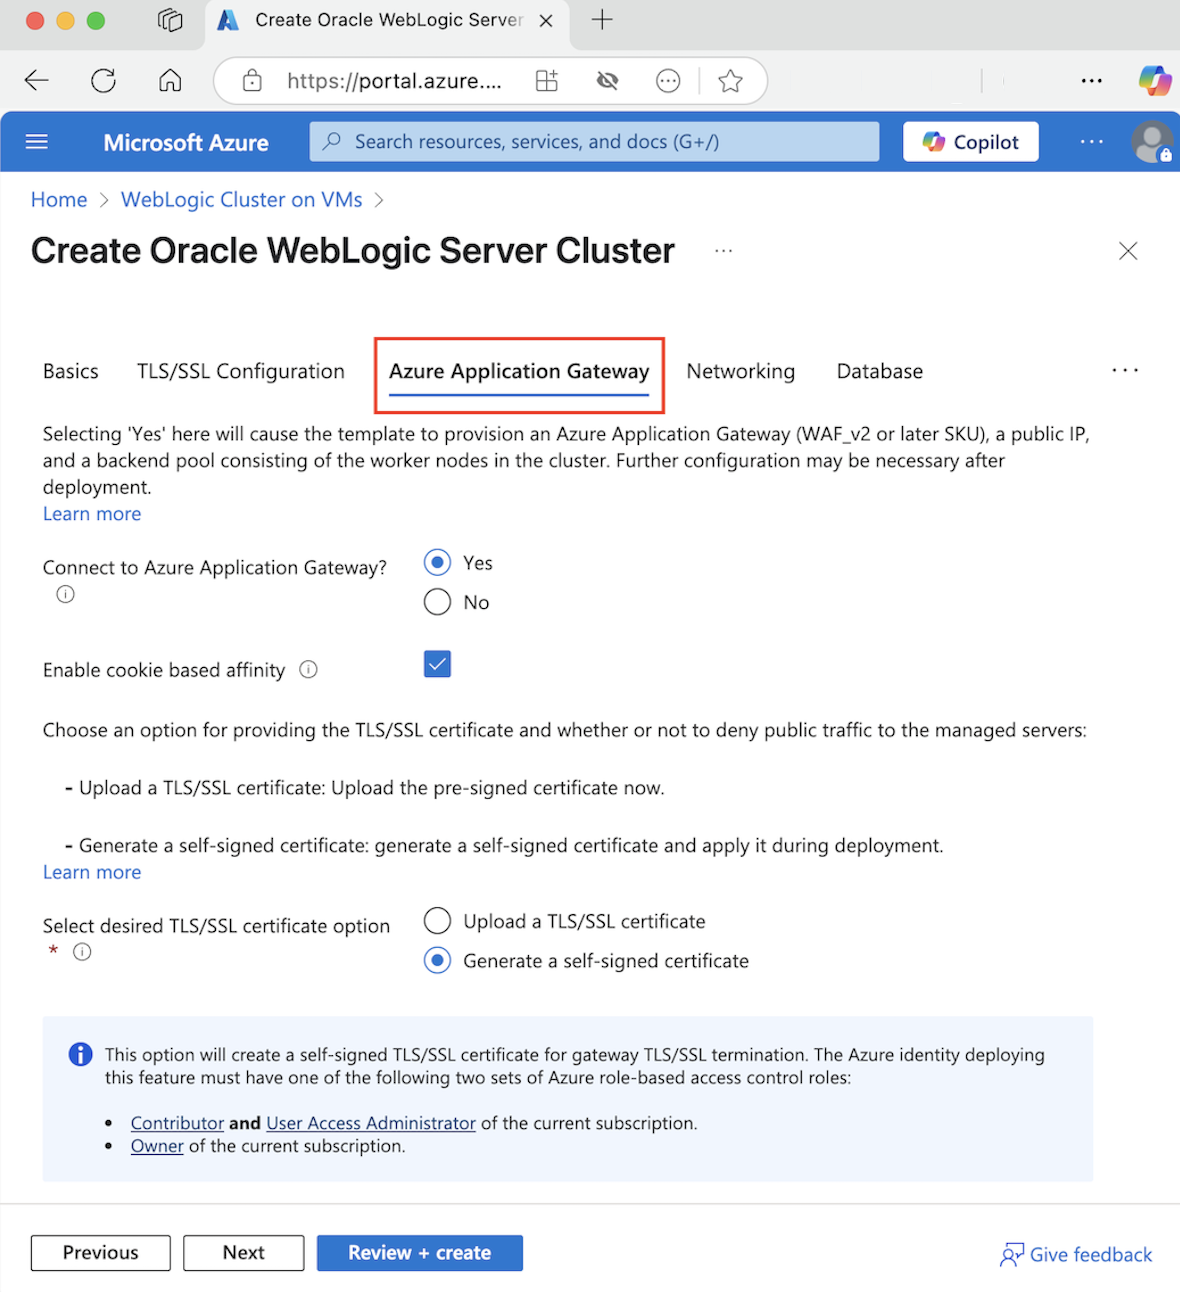
Choose how to provide the TLS/SSL certificate to the App Gateway
You have several options to provide the TLS/SSL certificate to the application gateway, but can only choose one. This section explains each option so you can choose the best one for your deployment.
Option one: Upload a TLS/SSL certificate
This option is suitable for production workloads where the App Gateway faces the public Internet, or for intranet workloads that require TLS/SSL. When you choose this option, an Azure Key Vault is automatically provisioned to contain the TLS/SSL certificate used by the App Gateway.
To upload an existing, signed, TLS/SSL certificate, use the following steps:
- Follow the steps from your certificate issuer to create a password-protected TLS/SSL certificate and specify the DNS name for the certificate. How to choose wildcard vs. single-name certificate is beyond the scope of this document. Either one works here.
- Export the certificate from your issuer using the PFX file format and download it to your local machine. If your issuer doesn't support exporting as PFX, tools exist to convert many certificate formats to PFX format.
- Completely fill out the Basics pane.
- Select the Azure Application Gateway section.
- Next to Connect to Azure Application Gateway, select Yes.
- Select Upload a TLS/SSL certificate.
- Select the file browser icon for the field SSL certificate. Navigate to the downloaded PFX format certificate and select Open.
- Enter the password for the certificate in the Password and Confirm password boxes.
- Select Next.
- Choose whether or not to deny public traffic directly to the nodes of the managed servers. If you select Yes, the managed servers are only accessible through the App Gateway.
Select DNS Configuration
TLS/SSL certificates are associated with a DNS ___domain name at the time the certificate issuer issues them. Follow the steps in this section to configure the deployment with the DNS name for the certificate. You must be far enough along in the deployment UI so that you already selected a resource group and virtual network for the deployment.
You can use a DNS Zone you already created, or enable the deployment to create one for you. To learn how to create a DNS zone, see Quickstart: Create an Azure DNS zone and record using the Azure portal.
Use an existing Azure DNS Zone
To use an existing Azure DNS Zone with the App Gateway, use the following steps:
- Next to Configure Custom DNS Alias, select Yes.
- Next to Use an existing Azure DNS Zone select Yes.
- Enter the name of the Azure DNS Zone next to DNS Zone Name.
- Enter the resource group that contains the Azure DNS Zone from the preceding step.
Note
The hostnames you define within the DNS Zone must be publicly resolvable before deploying the offer.
Enable the deployment to create a new Azure DNS Zone
To create an Azure DNS Zone to use with the App Gateway, use the following steps:
- Next to Configure Custom DNS Alias, select Yes.
- Next to Use an existing Azure DNS Zone select No.
- Enter the name of the Azure DNS Zone next to DNS Zone Name. A new DNS Zone is created in the same resource group as WLS.
Finally, specify the names for the child DNS zones. The deployment creates two child DNS zones for use with WLS: one for the admin console, and one for the App Gateway. For example, if the DNS Zone Name value is contoso.net, you could enter admin and app as the names. The admin console would be available at admin.contoso.net and the app gateway would be available at app.contoso.net. Don't forget to set up DNS delegation as described in Delegation of DNS zones with Azure DNS.

The other options for providing a TLS/SSL certificate to the App Gateway are detailed in the following sections. If you're satisfied with your chosen option, you can skip to the section Continue with the deployment.
Option two: Generate a self-signed certificate
This option is suitable for test and development deployments only. With this option, both an Azure Key Vault and a self-signed certificate are automatically created, and the certificate is provided to App Gateway.
To request the deployment to perform these actions, use the following steps:
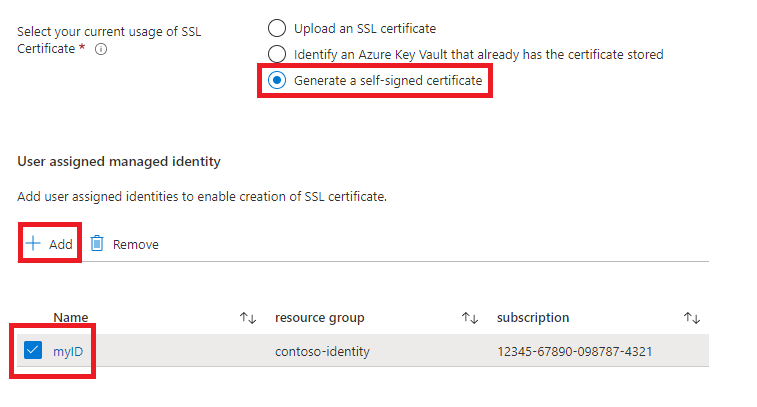
- In the Azure Application Gateway section, select Generate a self-signed certificate.
- Select a user-assigned managed identity. This selection is necessary to allow the deployment to create the Azure Key Vault and certificate.
- If you don't already have a user-assigned managed identity, select Add to begin the process of creating one.
- To create a user-assigned managed identity, follow the steps in the Create a user-assigned managed identity section of Create, list, delete, or assign a role to a user-assigned managed identity using the Azure portal. After you select the user-assigned managed identity, make sure the checkbox next to the user-assigned managed identity is checked.
Continue with the deployment
You can now continue with the other aspects of the WLS deployment as described in the Oracle documentation. If you're satisfied with your configuration, select Review + create, and then Create.
The deployment can take up to 15 minutes, depending on network conditions and other factors.
Validate successful deployment of WLS and App Gateway
This section shows a technique to quickly validate the successful deployment of the WLS cluster and Application Gateway.
If you selected Go to resource group and then myAppGateway at the end of the preceding section, you're now looking at the overview page for the Application Gateway. If not, you can find this page by typing myAppGateway in the text box at the top of the Azure portal, and then selecting the correct one that appears. Be sure to select the one within the resource group you created for the WLS cluster. Then, complete the following steps:
- In the left pane of the overview page for myAppGateway, scroll down to the Monitoring section and select Backend health.
- After the loading message disappears, you should see a table in the middle of the screen showing the nodes of your cluster configured as nodes in the backend pool.
- Verify that the status shows Healthy for each node.
Clean up resources
If you're not going to continue to use the WLS cluster, delete the Key Vault and the WLS Cluster with the following steps:
- Visit the overview page for myAppGateway as shown in the preceding section.
- At the top of the page, under the text Resource group, select the resource group.
- Select Delete resource group.
- The input is focused on the field labeled TYPE THE RESOURCE GROUP NAME. Type the resource group name as requested.
- Select Delete.
Next steps
Continue to explore options to run WLS on Azure.