Note
Access to this page requires authorization. You can try signing in or changing directories.
Access to this page requires authorization. You can try changing directories.
This article shows how to use the Azure Developer CLI (azd) to create a CI/CD pipeline with Azure DevOps Pipelines (Azure Pipelines) for an azd template. The pipeline enables you to push updates to a code repository and have your changes automatically provisioned and deployed to your Azure environment.
Note
The azd pipeline config command is in beta. For details, see the feature versioning and release strategy.
Prerequisites
- Install the Azure Developer CLI.
- Visual Studio Code installed.
Initialize the template
This example uses the Hello-AZD template, but you can follow these steps for any template that includes a pipeline definition file (found in the .github or .azdo folders).
In an empty directory, initialize the
hello-azdtemplate:azd init -t hello-azdWhen prompted, enter a name for the environment (for example, hello-azd).
Set up Azure Pipelines
Note
If you're using Azure Pipelines for a Java template on Windows, see the troubleshooting guide.
Create or use an Azure Pipelines organization
To use Azure Pipelines, you need an organization. Create one at https://dev.azure.com if you don't already have one.
Create a Personal Access Token (PAT)
The Azure Developer CLI requires a Personal Access Token (PAT) to configure Azure Pipelines. Create a new PAT with the following scopes:
- Agent Pools (read, manage)
- Build (read and execute)
- Code (full)
- Project and team (read, write, and manage)
- Release (read, write, execute, and manage)
- Service Connections (read, query, and manage)
Configure the pipeline
Run the following command to configure an Azure Pipelines project and repository with a deployment pipeline:
azd pipeline config --provider azdoNote
By default,
azd pipeline configfor Azure Pipelines uses client credentials. OIDC/federated credentials are not currently supported. Learn more about OIDC support inazd.Respond to the prompts:
Personal Access Token (PAT):
Paste your PAT.
Optionally, export your PAT as a system environment variable to avoid repeated prompts:
export AZURE_DEVOPS_EXT_PAT=<PAT>
Azure Pipelines Organization Name:
- Enter your organization name. This value is saved in the
.envfile for the current environment.
- Enter your organization name. This value is saved in the
A remote named "origin" was not found. Would you like to configure one?
- Yes
How would you like to configure your project?
- Create a new Azure Pipelines Project
Enter the name for your new Azure Pipelines Project OR Hit enter to use this name: ( {default name} )
- Select Enter, or create a unique project name.
Would you like to commit and push your local changes to start the configured CI pipeline?
- Yes
To verify the build, go to your project in the Azure Pipelines portal (https://dev.azure.com).
Make and push a code change
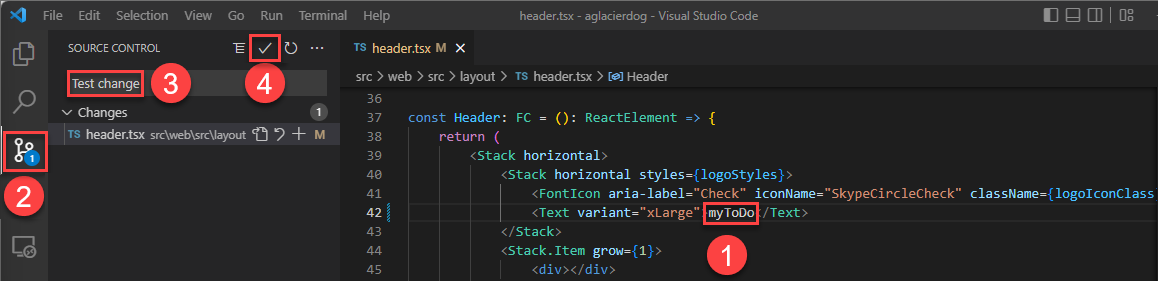
In the
/src/components/pagesdirectory, openHome.razor.Change the
Hello AZD!header text toHello, pipeline!and save the file.Create a branch and commit your change. The
mainbranch is protected, so push your changes from a new branch and create a Pull Request in Azure Pipelines. The pull request triggers the pipeline and blocks merging if the pipeline fails.Approve and merge your pull request to start the pipeline again.
In your browser, open your project's repository to see your commit and the Azure Pipeline run.
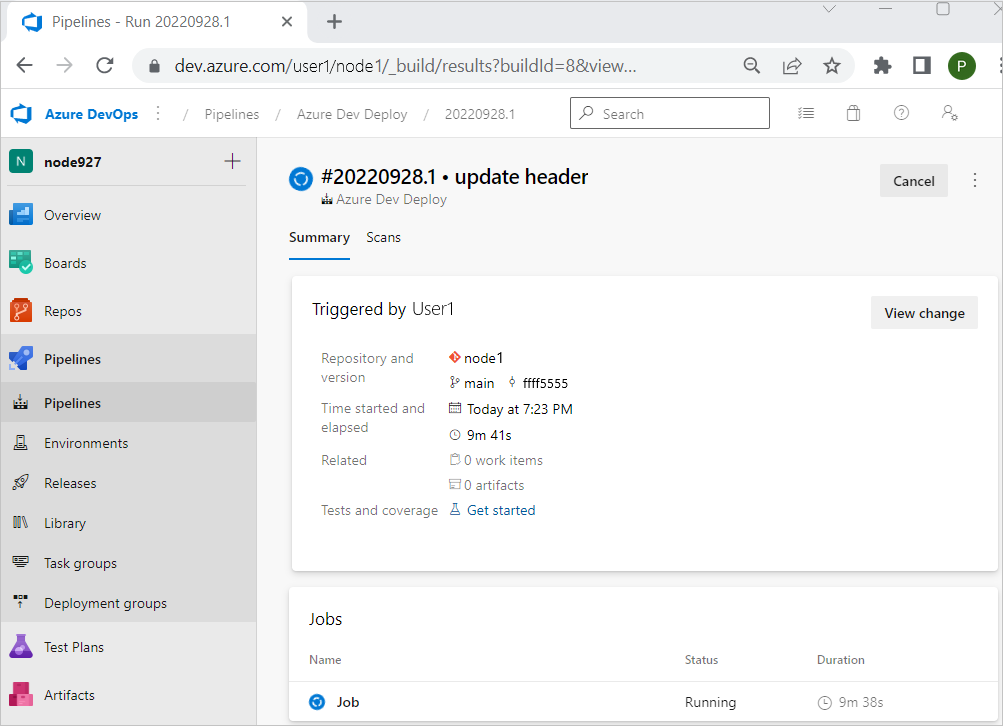
Visit the web frontend URL to inspect the update.
Use azd as an Azure Pipelines task
Add azd as an Azure Pipelines task to install azd in your pipeline. Add the following to .azdo/pipelines/azure-dev.yml:
trigger:
  - main
  - branch

pool:
  vmImage: ubuntu-latest
  # vmImage: windows-latest

steps:
  - task: setup-azd@0
    displayName: Install azd
Clean up resources
When you no longer need the Azure resources created in this article, run:
azd down