Note
Access to this page requires authorization. You can try signing in or changing directories.
Access to this page requires authorization. You can try changing directories.
Azure Cache for Redis Standard and Premium tiers offer redundancy by hosting each cache on two dedicated virtual machines (VMs) configured as primary and replica. If the primary VM becomes unavailable, the replica automatically takes over as the new primary.
When you create a Premium cache, you can increase the number of replicas up to three, giving a total of four VMs backing a cache. Multiple replicas provide higher resilience than a single replica.
This article describes how to create an Azure Cache for Redis Premium cache with added replicas by using the Azure portal.
Prerequisites
You need an Azure subscription. If you don't have one, create a free account.
Limitations
Creating more than one replica for a cache has the following limitations:
- Only Premium-tier Azure Cache for Redis supports adding more than one replica.
- You can't change the number of replicas after you create the cache.
- You can't use geo-replication with caches that have more than one replica.
- You can't use Append-only File (AOF) data persistence with caches that have more than one replica.
Create a Premium cache with added replicas
Create a cache by following the instructions at Quickstart: Create an Azure Redis cache. On the Basics tab, select Premium for Cache SKU, and select a Size from P0 to P6.
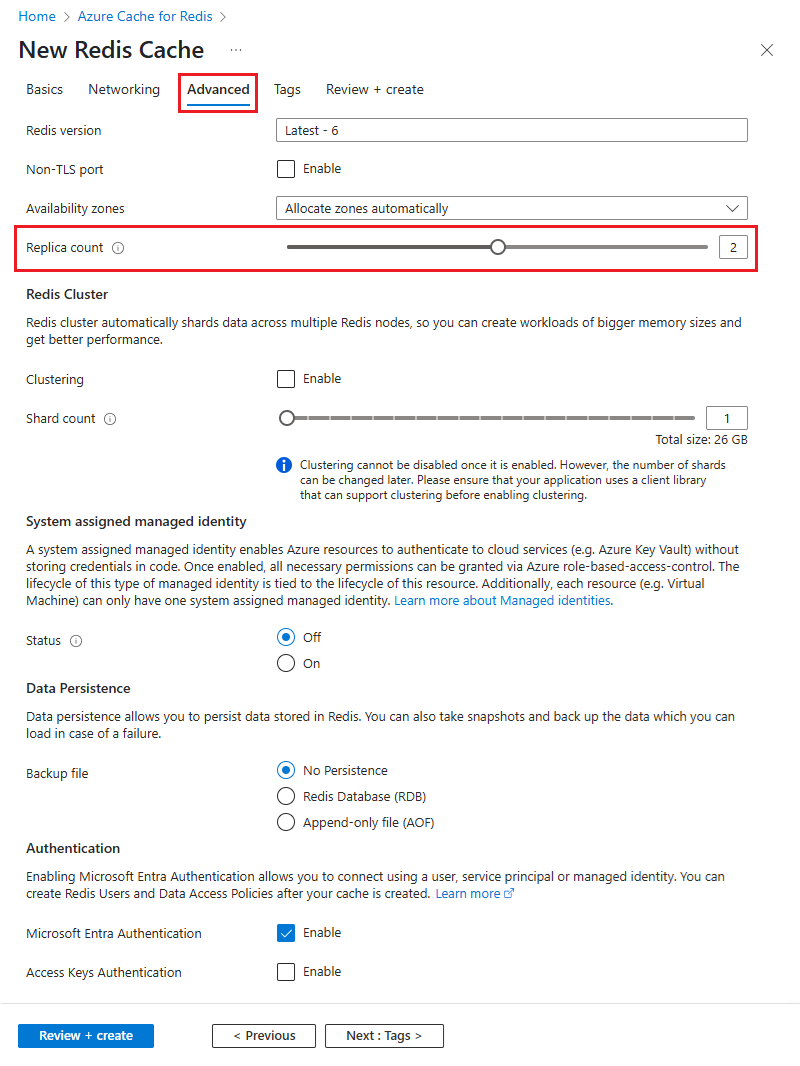
On the Advanced tab, for Replica count, increase the number of replicas to 2 or 3 replicas.
Configure clustering, data persistence, and other settings as desired.
Note
You can't use Append-only File (AOF) data persistence if you create more than one replica.
Select Review + Create, and when validation passes, select Create.
It takes a while for the cache to create. You can monitor progress on the Azure Cache for Redis Overview page. When Status shows as Running, the cache is ready to use.
Note
You can't change the number of replicas in a cache after the cache is created.