Quick Analysis Reports
One of the most powerful features in OI Reports is the ability to access previously run report versions to use for a quick analysis. Multiple users can view the same report concurrently without affecting the original report or the reports of other viewer users. This feature facilitates users who see value in the report content but who may want to hone in on specific data for their own report.
Users with the viewer role can run a quick analysis report based on a report in the Reports table, as long it has a status of "Success". Quick Analysis Reports can be run with or without making changes to the report attributes and values.
Quick Analysis Report Types
The Quick Analysis Report types are:
- Scheduled
- Ad Hoc
Important Points About Quick Analysis Reports
Here are some important points to be aware of when working with Quick Analysis Reports:
- Data Source Attributes:
- Original report: creating and/or making changes to a Quick Analysis Report do not affect the original report; changes apply only to the report currently being run.
- Search Responsiveness: enter characters in an attribute or value field and the system displays matches to select from.
- One filter for all attributes: when you set a filter for an attribute in one data source, the filter will also apply to the same-named attribute in other data sources used in the report.
- Making changes to the report or not:
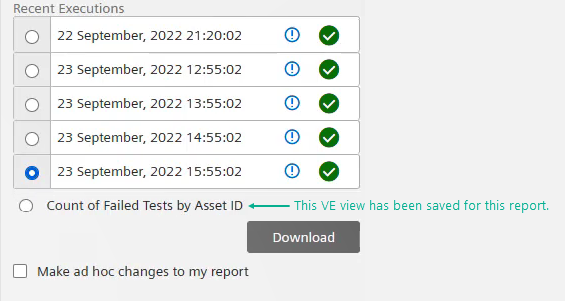
- When you select a radio button for a report version, VE views associated with the report (if any) display beneath the "Recent Executions" list, as shown in the example below. At this point you can select the VE view (there may be several) and download the report, or you can make changes to the report by selecting the "Make ad hoc changes to my report" check box.
Scheduled Quick Analysis Reports
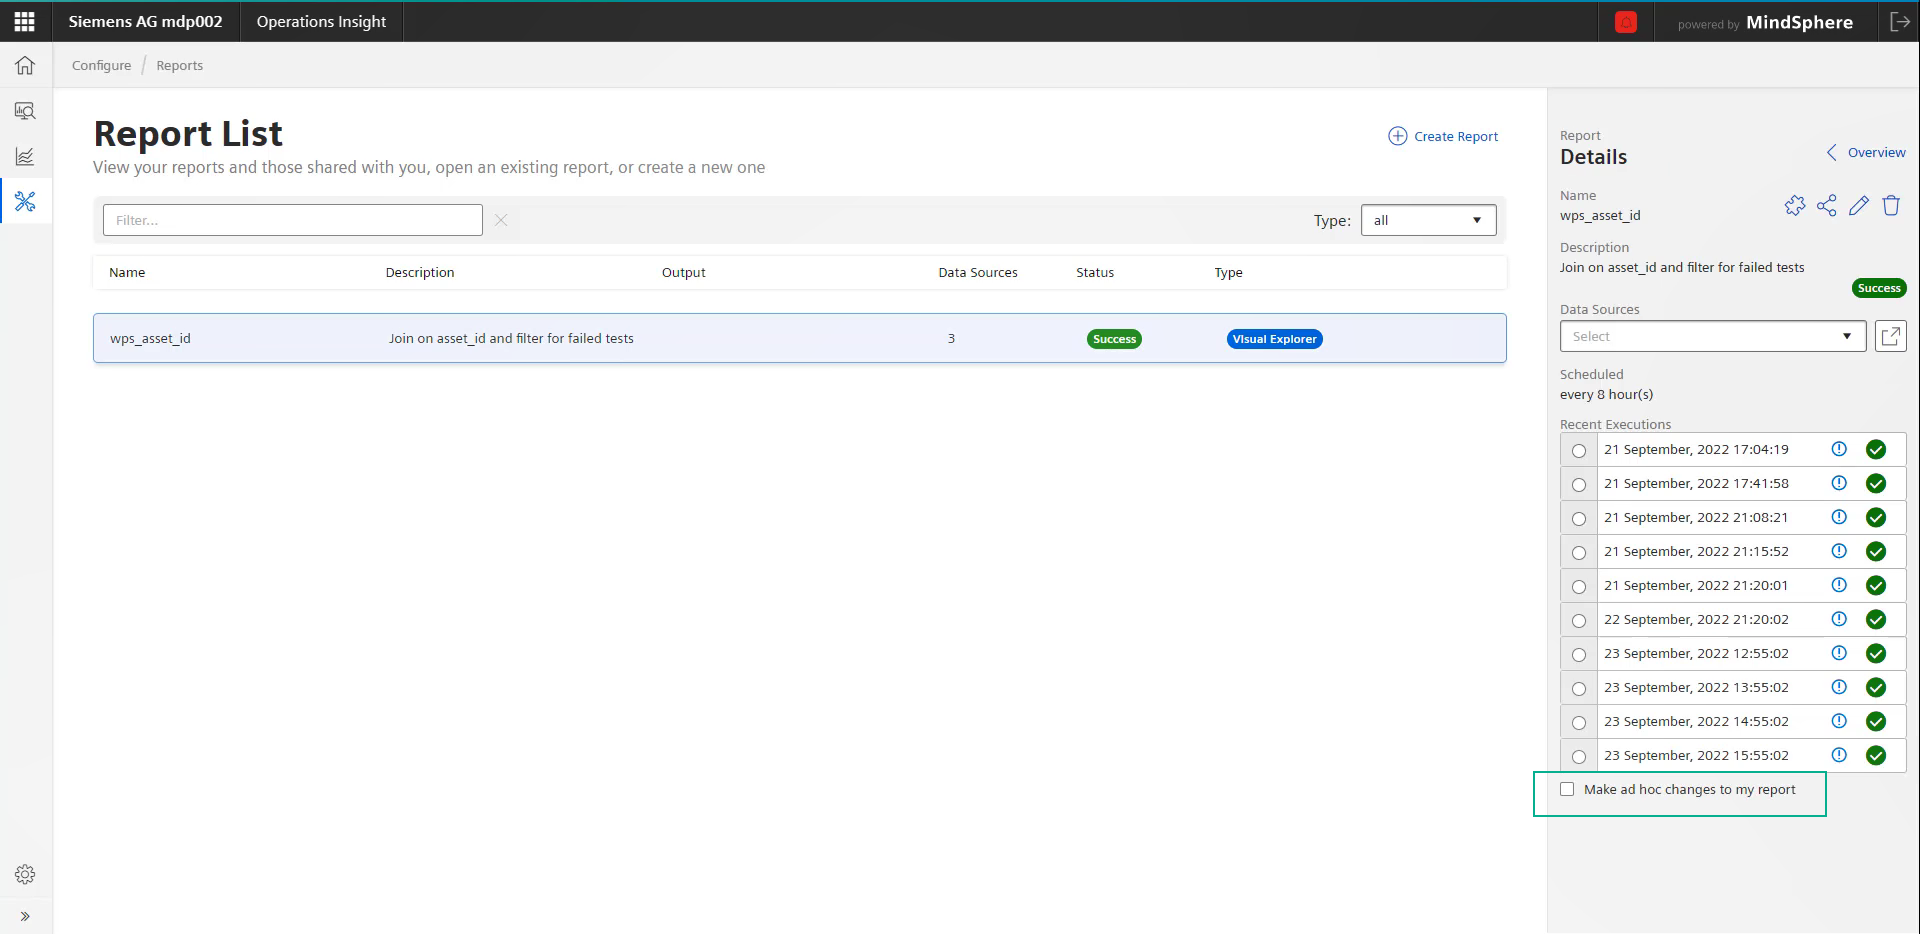
When you select a scheduled report in the Reports table, the right panel displays recently run report versions; hover over a version's info icon to see its filter settings.
How to Run a Scheduled Quick Analysis Report with No Changes
Follow these steps to run a Quick Analysis Report with No Changes:
- Select a report in the Reports table. The right panel displays recent executions of the report.
- Select the radio button for the report you want to run. VE Views saved for the report display beneath the Recent Executions list.
- Select the radio button for the VE view you want to use. The Download button is activated.
- Click the Download button. A PDF version of the report is downloaded.
Scheduled Quick Analysis Reports with Ad Hoc Changes
When you select a scheduled report in the Reports table, the right panel displays recently run report versions; hover over a version's info icon to see its filter settings.
How to Run a Scheduled Quick Analysis Report - with Ad Hoc Changes
Follow these steps to generate a Quick Analysis Report:
- Select a scheduled report in the table. A list of recent report executions displays.
- Select one of the recent versions to base your report on. VE views (if any) related to the report version display beneath the Recent Executions list.
- If you want to make changes, select the "Make ad hoc changes to my report" check box. The "Select and Customize Report Contents" area displays the attributes and values used in the report. If no changes are required, skip to Step 6.
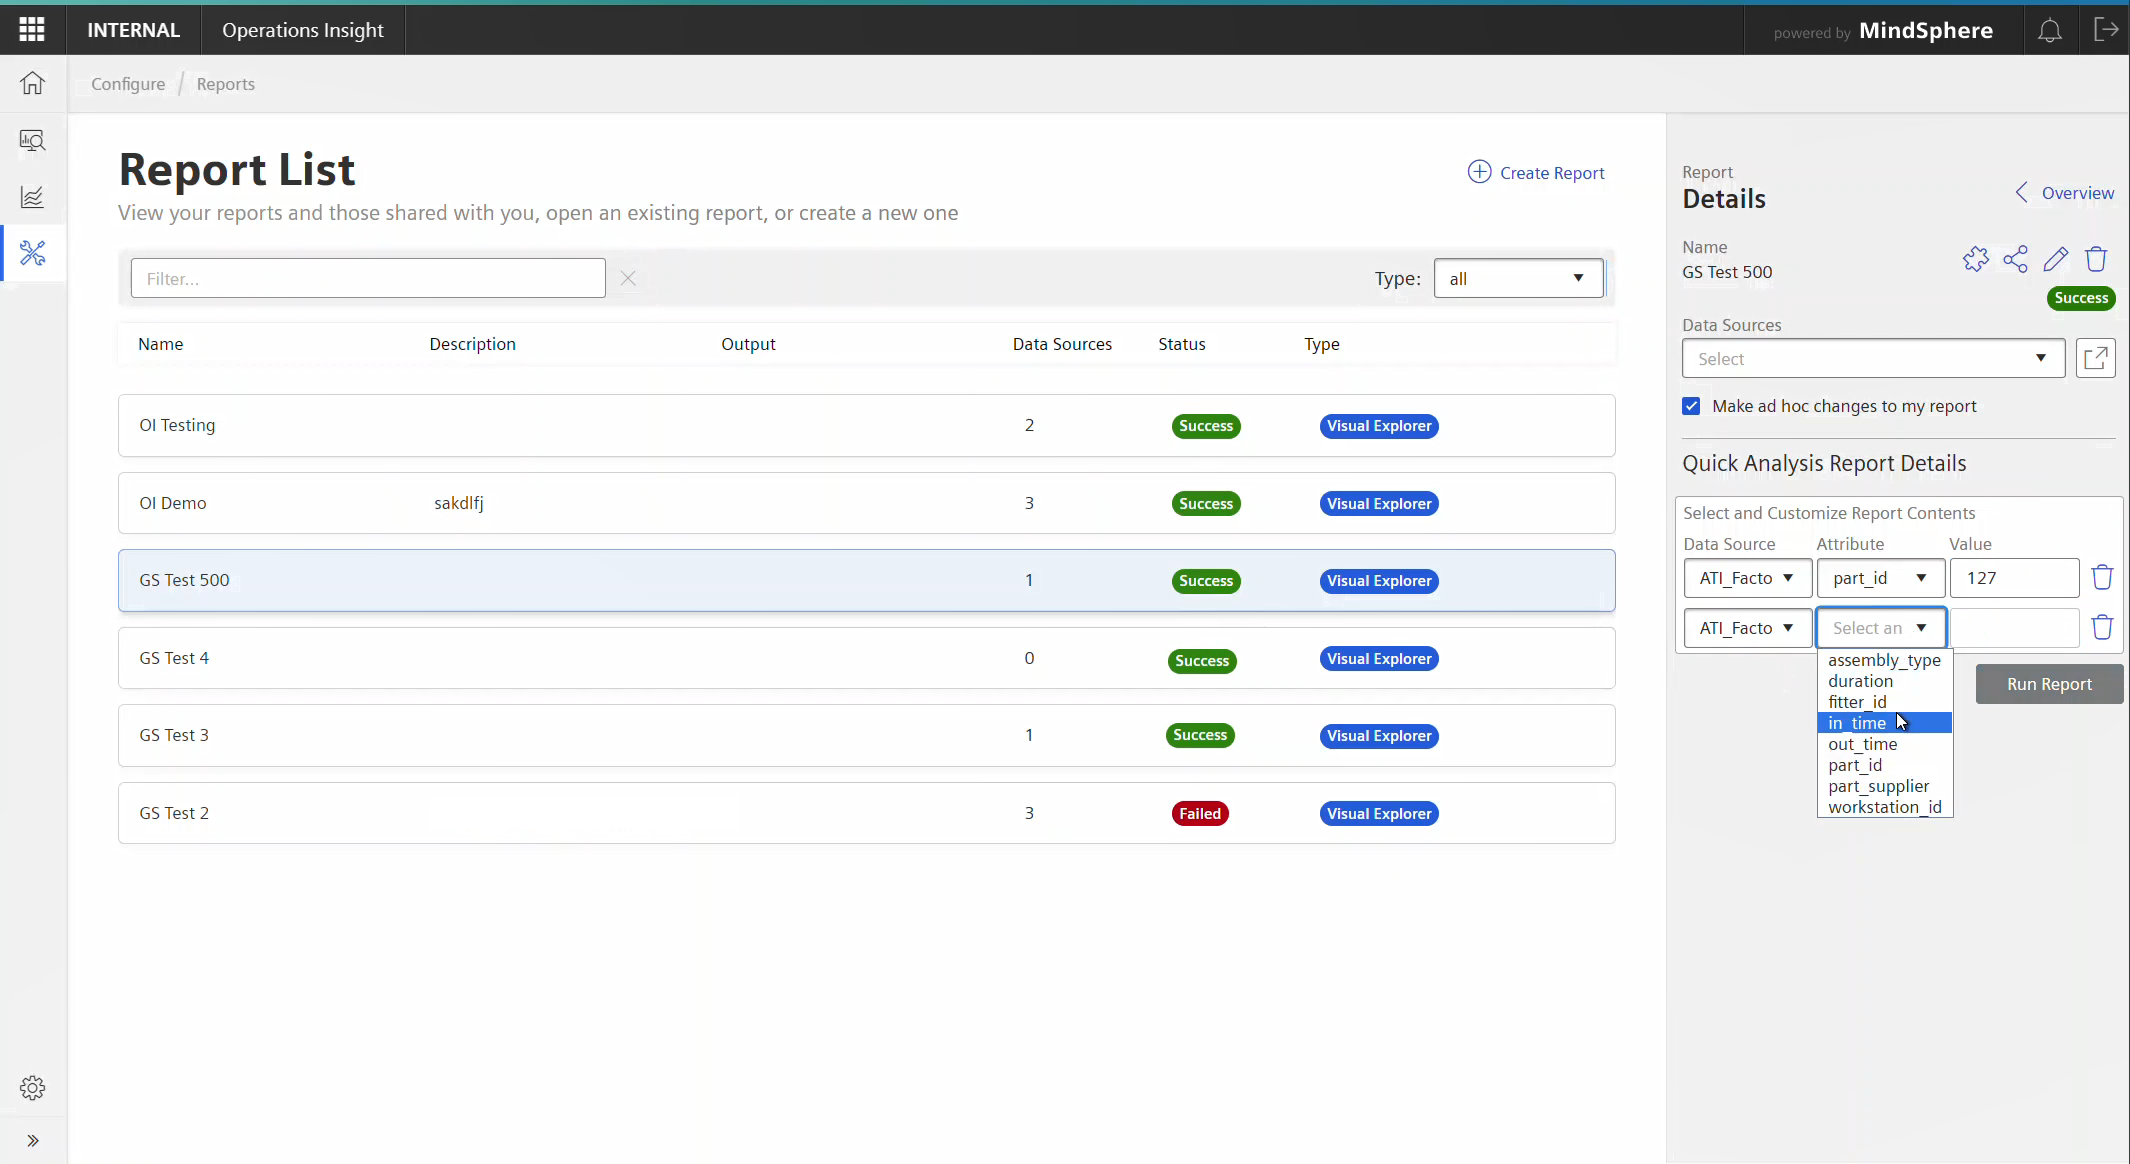
- Select an attribute and a value from the drop-down list or enter text in the value field. An additional row displays for making more changes, and the "Run Report" button is activated.
- Repeat Step 4 as needed.
- Click "Run Report". Data is retrieved according to the filters and joins entered report opens in Visual Explorer with the VE View you selected. The VE View you selected displays beneath the Run Report button, and "In Progress" displays while the report is running and will change to "Success", or "Failed" when finished.
Quick Analysis Reports-Ad Hoc
Ad Hoc QARs allow you to run a report by using an existing report with a "Success" status. When you select the report in the Reports table, the right panel displays the "Select and Customize Report Contents" section, where you can make changes to the data source attributes and values.
Ad Hoc Quick Analysis Report Illustration
Here is an example of the "Select and Customize Report Contents" area that shows the selection fields in which you can make ad hoc changes to the report data:
How to Generate an Ad Hoc Quick Analysis Report
Follow these steps to run an ad hoc Quick Analysis Report:
- Select a report in the table. The report details display in the right panel and the check box for making ad hoc changes to the report is checked (default setting).
- If the original report uses an absolute date range, this cannot be changed; if it uses a relative date range, i.e., "last 30 days", a date range selector displays and you can select a new date range.
- Select the data source from the drop-down list. The attributes of the selected data source populate the Attributes field.
- Select an attribute from the drop-down list. If the attribute is indexed, values populate the Value drop-down list, and you can select one; if the attribute is not indexed, a text box displays in which you can enter a value.
- Additional rows display so you can customize additional fields.
- Click "Run Report". The report opens in Visual Explorer.
One of the most powerful features in OI Reports is the ability to access previously run report versions to use for a quick analysis. Multiple users can view the same report concurrently without affecting the original report or the reports of other viewer users. This feature facilitates users who see value in the report content but who may want to hone in on specific data for their own report.
Users with the viewer role can run a quick analysis report based on a report in the Reports table, as long it has a status of "Success". Quick Analysis Reports can be run with or without making changes to the report attributes and values.
Quick Analysis Report Types
The Quick Analysis Report types are:
- Scheduled
- Ad Hoc
Important Points About Quick Analysis Reports
Here are some important points to be aware of when working with Quick Analysis Reports:
- Data Source Attributes:
- Original report: creating and/or making changes to a Quick Analysis Report do not affect the original report; changes apply only to the report currently being run.
- Search Responsiveness: enter characters in an attribute or value field and the system displays matches to select from.
- One filter for all attributes: when you set a filter for an attribute in one data source, the filter will also apply to the same-named attribute in other data sources used in the report.
- Making changes to the report or not:
- When you select a radio button for a report version, VE views associated with the report (if any) display beneath the "Recent Executions" list, as shown in the example below. At this point you can select the VE view (there may be several) and download the report, or you can make changes to the report by selecting the "Make ad hoc changes to my report" check box.
Scheduled Quick Analysis Reports - No Changes
When you select a scheduled report in the Reports table, the right panel displays recently run report versions; hover over a version's info icon to see its filter settings.
How to Run a Scheduled Quick Analysis Report with No Changes
Follow these steps to run a Quick Analysis Report with No Changes:
- Select a report in the Reports table. The right panel displays recent executions of the report.
- Select the radio button for the report you want to run. VE Views saved for the report display beneath the Recent Executions list.
- Select the radio button for the VE view you want to use. The Download button is activated.
- Click the Download button. A PDF version of the report is downloaded.
Scheduled Quick Analysis Reports with Ad Hoc Changes
When you select a scheduled report in the Reports table, the right panel displays recently run report versions; hover over a version's info icon to see its filter settings.
How to Run a Scheduled Quick Analysis Report - with Ad Hoc Changes
Follow these steps to generate a Quick Analysis Report:
- Select a scheduled report in the table. A list of recent report executions displays.
- Select one of the recent versions to base your report on. VE views (if any) related to the report version display beneath the Recent Executions list.
- If you want to make changes, select the "Make ad hoc changes to my report" check box. The "Select and Customize Report Contents" area displays the attributes and values used in the report. If no changes are required, skip to Step 6.
- Select an attribute and a value from the drop-down list or enter text in the value field. An additional row displays for making more changes, and the "Run Report" button is activated.
- Repeat Step 4 as needed.
- Click "Run Report". Data is retrieved according to the filters and joins entered report opens in Visual Explorer with the VE View you selected. The VE View you selected displays beneath the Run Report button, and "In Progress" displays while the report is running and will change to "Success", or "Failed" when finished.
Quick Analysis Reports-Ad Hoc
Ad Hoc QARs allow you to run a report by using an existing report with a "Success" status. When you select the report in the Reports table, the right panel displays the "Select and Customize Report Contents" section, where you can make changes to the data source attributes and values.
Ad Hoc Quick Analysis Report Illustration
Here is an example of the "Select and Customize Report Contents" area that shows the selection fields in which you can make ad hoc changes to the report data:
How to Generate an Ad Hoc Quick Analysis Report
Follow these steps to run an ad hoc Quick Analysis Report:
- Select a report in the table. The report details display in the right panel and the check box for making ad hoc changes to the report is checked (default setting).
- If the original report uses an absolute date range, this cannot be changed; if it uses a relative date range, i.e., "last 30 days", a date range selector displays and you can select a new date range.
- Select the data source from the drop-down list. The attributes of the selected data source populate the Attributes field.
- Select an attribute from the drop-down list. If the attribute is indexed, values populate the Value drop-down list, and you can select one; if the attribute is not indexed, a text box displays in which you can enter a value.
- Additional rows display so you can customize additional fields.
- Click "Run Report". The report opens in Visual Explorer.