Jupyter Notebook Code Examples
Working with Jupyter Notebooks
You can operate all the Insights Hub APIs including Integrated Data Lake, Model Management, and IoT Time Series within your Jupyter Notebooks, which serve as model development workspaces in Predictive Learning. Valid access credentials are required for the specific Insights Hub APIs you intend to use.
Access Jupyter Notebooks through the Manage Environments page. The following information will help you launch and configure a Jupyter Notebook environment.
Note
- PrL environments do not persist Jupyter Notebooks files after creation. Save notebooks to your local machine before stopping the environment.
- The dataset feature will be deprecated across all platforms. Currently unavailable in Azure Private Cloud environments. For more information, refer to datasets.
File System Restrictions for Model Validation and Job Execution
- Users cannot create new files or folders in Jupyter notebooks and Docker containers during model validation and job execution, except in designated directories.
- The file system operates in read-only mode during model validation and job execution, with the exception of the
/tmpdirectory. - All new files or folders created during model validation and job execution must be placed in the designated directory only.
Environment Configuration Verification
Your environment requires specific libraries for script execution. Some libraries necessary for minimal cluster services are preinstalled. Links to these libraries are available in the Open Source Software documentation section.
Execute this command to examine installed packages in Jupyter:
%pip freeze
Install required packages at the beginning of each notebook and execute them when starting the cluster. Custom configurations are not preserved between environment stops and starts.
Installing Your Own Python Libraries
Note
For LPC environments, install an older AWS SDK version due to known compatibility issues fix: MissingContentLength in boto3 version 1.36.1 · Issue #4398 · boto/boto3. Use commands like pip install boto3"<1.36.0" awscli"<1.37.0"
Use these commands to install custom libraries:
# upgrade pip and install required libraries
%pip install --upgrade pip
%pip install requests
%pip install pandas
%pip install pyarrow
Obtaining a Temporary Session Token from Integrated Data Lake
Here is a sample script that performs a simple POST request to IDL API, which returns a temporary session that can be used for various operations in IDL space:
import os
import requests
import json

# The IDL endpoint
dlpath = '/datalake/v3/generateAccessToken'

# The base gateway that provides transparent authentication
gw = os.environ['GATEWAY_ENDPOINT'] + 'gateway/'

headers = {
'Content-Type': 'application/json'
}
payload="{ \"subtenantId\":\"\" } "
dl_url = gw + dlpath

# Perform the request
response = requests.post(dl_url, data=payload, headers=headers)

# The response should be a JSON object
idlSession = json.loads(response.text)

# Update the environments with the temporary credentials
os.environ["AWS_ACCESS_KEY_ID"] = idlSession['credentials']['accessKeyId']
os.environ["AWS_SECRET_ACCESS_KEY"] = idlSession['credentials']['secretAccessKey']
os.environ["AWS_SESSION_TOKEN"] = idlSession['credentials']['sessionToken']

# Now operations against the IDL S3 bucket can be performed directly
# ...
External library repositories have access restrictions. Contact your organization's Predictive Learning administrator for additional external source requirements.
Environment stops result in the loss of all installed libraries and modifications, requiring users to re-run installation commands each time Jupyter imports notebooks. Re-running installation commands ensures that your environment contains current dependencies.
Data Upload to Integrated Data Lake using Presigned URL Endpoint
# upgrade pip and install required libraries
%pip install --upgrade pip
%pip install requests --force-reinstall --upgrade
%pip install pandas --force-reinstall --upgrade
%pip install pyarrow --force-reinstall --upgrade

import datetime
import requests
import os
import json
import re

HEADERS = {
'Accept': '*/*',
'Accept-Encoding': 'gzip, deflate, br',
'Connection': 'keep-alive',
'Content-Type': 'application/json'
}

# The base gateway that provides transparent authentication
GATEWAY = os.environ['GATEWAY_ENDPOINT'] + '/gateway/'

OUTPUT_FOLDER = 'OUTPUT_FOLDER'

# Get a signed URL for down/upload of data. The function
# attempts for 5 times to obtain the URL and then raises an exception.
# The same function can also generate an upload signed url
def getSignedURL(fileName, folder, attempt=0, upload=True):
  if upload:
    IDLpath = 'datalake/v3/generateUploadObjectUrls'
  else:
    IDLpath = 'datalake/v3/generateDownloadObjectUrls'

  IDLFilePath = '/%s/%s' % (folder, fileName)
  url = GATEWAY + IDLpath
  body='{"paths": [{"path": "%s"}]}' % IDLFilePath

  # Send request to receive a signed url
  response = requests.post(url, headers=HEADERS, data=body)

  try:
    # Return the signed url
    return json.loads(response.text)['objectUrls'][0]['signedUrl']
  except KeyError:
    if attempt < 5:
        attempt += 1
        return getSignedURL(fileName, attempt, upload)
    else:
        raise Exception('Failed to get a signed URL')

# Create a text file using bash
!echo "This is a test!" >> test.txt


fileName='test.txt'
signedURL = getSignedURL(fileName, OUTPUT_FOLDER)

# upload the test file using the signed url
requests.put(signedURL, headers=HEADERS, data=fileName)
key_id = os.environ["CLIENT_ID"]
key_secret = os.environ["CLIENT_SECRET"]
tenant = os.environ["tenant"]
subTenant = os.environ.get("subtenant")
authServer = os.environ["TOKEN_ENDPOINT"]
coreGateway= os.environ["CORE_GATEWAY"]

class JsonWebToken():
    # Handles getting JWT from environment controller using HMAC.
    # Refreshes token whenever it gets expired.

    def __init__(self):
        self.token = self.__refreshToken()

    def __refreshToken(self):
        #Gets new JWT token using HMAC
        sign, timestamp = self.__getHmacSignature()
        headers = {
            'Authorization': 'HMAC-SHA256 Credential=' + key_id + '&SignedHeaders=host;x-msg-timestamp&Signature=' + sign,
            'x-msg-timestamp': timestamp
        }
        response = requests.get(authServer, headers=headers, verify=False)
        print(response.status_code)
        return json.loads(response.text)["access_token"]

    def __getHmacSignature(self):
        # Creates HMAC Signature for getting JWT
        payload, timestamp = self.__getPayload()
        sign = hmac.new(key_secret.encode(), payload.encode(), hashlib.sha256).hexdigest()
        return sign, timestamp

    def __isExpired(self):
        # Checks whether existing JWT is expired or not.
        decoded = jwt.decode(self.token, verify=False, options={'verify_signature': False})
        current = int(datetime.now().timestamp()) + 10
        if decoded['exp'] <= current:
            return True
        return False

    def getToken(self):
        # Gets token if expired. This method should be used by users of this class.
        if self.__isExpired():
        print("token is expired. getting new one...")
        self.__refreshToken()
        return self.token

    def __getPayload(self):
        timestamp = datetime.utcnow().strftime('%Y%m%dT%H%M%SZ')
        payload = "GET\n" + urlparse(authServer).netloc + "\n" + timestamp + "\n" + tenant
        print(payload)
        if subTenant != None:
            payload = payload + "\n" + subTenant

        return payload, timestamp

    jwtobj = JsonWebToken()

    # Generate Upload URL

    # create random string
    random_string = ''.join(random.choices(string.ascii_lowercase, k = 10))
    print(random_string)
    filename = 'readme.json'

    path = random_string + "/" + filename
    body = json.dumps({
    "paths": [
        {
            "path": path
        }
    ],
    "subtenantId": "",
    "isMicrosoftRoutingEnabled": False
    })

    with open(filename, 'w') as f:
        random_content = "{ 'random_string': '"+ ''.join(random.choices(string.ascii_lowercase, k = 50)) + "' }"
        f.write(random_content)

    upload_url = coreGateway + "/api/datalake/v3/generateUploadObjectUrls"

    headers = {
        'Content-Type': 'application/json',
        'Accept': 'application/json',
        'Authorization': 'Bearer ' + jwtobj.getToken()
    }

    response = requests.post(upload_url, data=body, headers=headers)

    print("response code: " + str(response.status_code))
    print(response.content)

    signedUploadUrl = json.loads(response.content)['objectUrls'][0]['signedUrl']
    print("Signed Upload URL: " + signedUploadUrl)
How to download IoT Data
Execute these commands to retrieve data from IoT sources:
# Prepare required libraries
%pip install --upgrade pip
%pip install requests --force-reinstall --upgrade
%pip install awscli --force-reinstall --upgrade
%pip install pandas sklearn seaborn matplotlib joblib

import json
import io
import os
import datetime
import time
from dateutil import parser
import random
from threading import Thread
import requests
import pandas as pd
import tempfile

# Define a function that performs IoT data reads
def read_iot(entity_id = "<<iot_entity_id_GUID>>",
           aspect_name = "<<aspect_name>>",
           tenant = "tenantname",
           max_results = 2000, #max is 2000
           from_dt = "2020-06-01T13:09:37.029Z",
           to_dt = "2020-07-01T08:02:27.962Z",
           variable = "pressure",
           sort = "asc"):

    if variable is not None:
       url = "?from=" + from_dt + "&to=" + to_dt + "&sort=" + sort + "&limit=" + str(max_results) + "&select=" + variable
   else:
       url = "?from=" + from_dt + "&to=" + to_dt + "&sort=" + sort + "&limit=" + str(max_results)

   # this is the IoT Timeseries API base URL
   TSpath = 'iottimeseries/v3/timeseries'

   # this is the Predictive Gateway URL that handles authentication for your API calls
   gw = os.environ['GATEWAY_ENDPOINT'] + '/gateway/'
   headers = {
       'Content-Type': 'application/json'
   }
   iot_url = gw + TSpath + "/" + entity_id + "/" + aspect_name + url
   response = requests.get(iot_url, headers=headers)
   return response

import pandas as pd
import tempfile

start = datetime.datetime.utcnow() - datetime.timedelta(days=70)
end = start + datetime.timedelta(days=30)

# Call for reading IoT data
response = read_iot(entity_id = "<<iot_entity_id_GUID>>",
           aspect_name = "<<aspect_name>>",
           tenant = "tenantname",
           max_results = 2000, #max is 2000
           from_dt = start.strftime('%Y-%m-%dT%H:%M:%S.%f')[:-3] + 'Z',
           to_dt = end.strftime('%Y-%m-%dT%H:%M:%S.%f')[:-3] + 'Z',
           sort = "asc",
           variable = None)

if response.status_code == 200:
   f = tempfile.TemporaryFile()
   f.write(response.content)
   f.seek(0)

   # we read the IoT data into a Pandas DataFrame
   data = pd.read_json(f.read())
   f = tempfile.TemporaryFile()
   f.write(response.content)
   f.seek(0)
   print(data.shape)
else:
   print(response.status_code)
   print(response.content)
Job Execution Input Parameters
Job executions require input parameters from these sources:
- IoT (Internet of Things)
- IDL (Integrated Data Lake)
Job Manager copies inputs from the first two sources to temporary locations accessible by your code. Jupyter notebooks provide access to three variables, whose names are self-explanatory:
inputFolder
outputFolder
datasetName
outputFolder is provided write access for your code execution to use. The contents of the outputFolder will be copied into the output parameter specified in the Job configuration. Access these variables using the Jupyter magic command %store:
%store -r inputFolder #-r specifies a read %store -r outputFolder %store -r datasetName
The datasetName variable contains values only when using IoT input types. The job execution engine presets the inputFolder variable with the temporary ___location path containing input files or data exported from the IoT input parameters. This path points to an S3 storage on AWS or blob storage on Azure without the associated prefix (such as s3://). Use the outputFolder variable in Jupyter notebooks as shown:
!aws s3 cp /tmp/mylocalfile.txt s3://$outputFolder+'/myfile.txt'
!pip install azure_cli
# reads the inputFolder and ouputFolder variables, preparing them for use
%store -r inputFolder
%store -r outputFolder

input = inputFolder
output = outputFolder
!az storage blob download --account-name prlstorageanls -c jobmanager -f data.csv -n $input'/data.csv' --auth-mode login
!az storage blob upload --account-name prlstorageanls -c jobmanager -f data.csv  -n $output'/output.csv' --auth-mode login
inputPath='s3://' + os.environ.get('inputFolder') + '/'
outputPath='s3://' + os.environ.get('outputFolder') + '/'
endpoint=os.environ.get('AWS_ENDPOINT_URL') + '/'

# Create the directory
directory_path = '/tmp/upload_dir'
os.makedirs(directory_path, exist_ok=True)
os.chmod(directory_path, stat.S_IRWXU)

!aws s3 cp $inputPath /tmp/upload_dir --recursive --endpoint-url $endpoint

!aws s3 cp /tmp/upload_dir $outputPath --recursive --endpoint-url $endpoint
Jupyter notebooks do not include a built-in dataset loading library. Various Python methods can achieve dataset loading. Contact support for guidance if you encounter dataset loading issues.
Note
Both inputFolder and outputFolder variables reference remote storage paths, not local folders. Standard file functions do not work with these paths. CLI and shell commands function correctly when using appropriate prefixes. For Python or Scala libraries compatible with remote storage services, refer the respective library documentation. For example, the pandas Python library can save and read files from AWS S3 storage.
How to use exported IoT Datasets
Notebook environments include the prlutils library for reading parquet dataset files into Pandas DataFrames. Use this code snippet to display available datasets and load individual datasets:
from prlutils import datasetutils
import boto3
import os
import json
import s3fs

du = datasetutils.DatasetUtils()
datasetnames = du.get_dataset_names()
print('Dataset names: ' + str(datasetnames))
#ds.shape
You will get a list of datasets like in:
['test_asset_2',
 'Last30DaysAsset2Filtered',
 'Last30DaysAsset2']
Load the desired dataset using:
ds = du.load_dataset_by_name(datasetnames[0])
ds
and verify the data immediately: 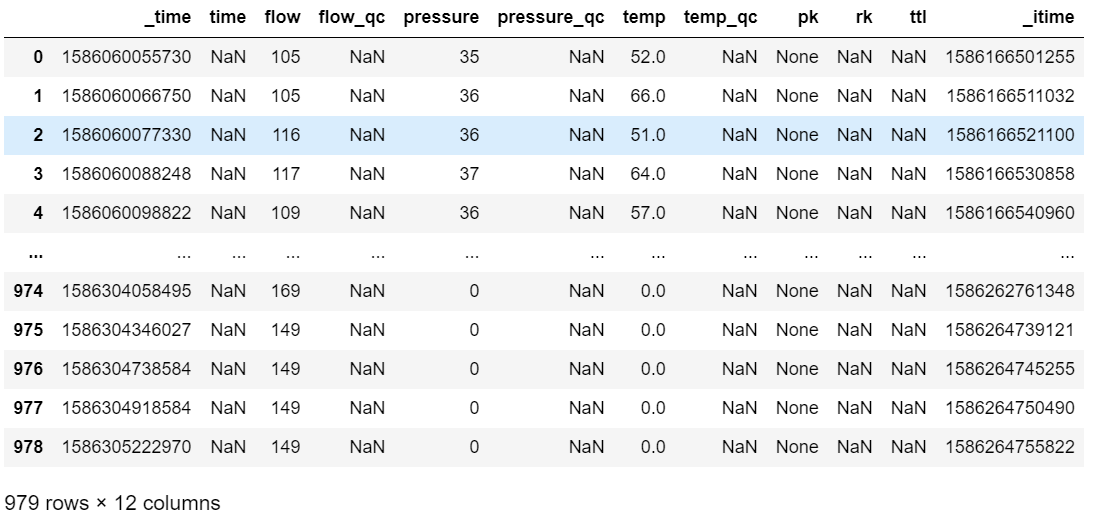
Use your dataset like any standard Pandas DataFrame:
filteredDataset = ds[ds['temp']>60]
print("Number of entries AFTER filtering: "+ str(filteredDataset.shape))
try:
    path = "s3://"+outputFolder
    filteredDataset.write.csv(path)
    filteredDataset.write.csv('s3://prl-storage-216273414971/prlteam/data/')
except:
    print('Output folder is None.')
else:
    print('Filtered dataset written to outputFolder' + outputFolder)
If issues occur with the library, verify that the Dataset utility dependencies do not conflict with previously installed Python libraries. The utility library requires these packages:
%pip install pyarrow fastparquet fss pec s3fs boto3 awscli
Additional Jupyter Notebook Resources
Jupyter provides extensive customization options and supports multiple programming languages. Explore these resources for additional information:
https://jupyter.org/documentation
https://jupyter-notebook.readthedocs.io/en/stable/
https://ipython.readthedocs.io/en/stable/interactive/magics.html
Except where otherwise noted, content on this site is licensed under the Development License Agreement.