Importing Time Series Data
The "Time Series Import" allows you to import the historical IoT time series data to Integrated Data Lake. You can import the time series data in two ways:
One Time Import
In "One Time Import", you can bulk import the historical IoT time series data only once.
To create a import time series data, follow these steps:
-
In the left navigation, select the "Time Series Import" tab and click "One Time Import".
-
Click
 .
.
The Import Time Series Data screen is displayed.
-
In the "Basic info" section, enter the "Destination Path" and the "Task Name".
Info
The "Destination Path" refers to the storage path where the time series data will be stored in Data Explorer.
-
In the "Date/time Range" section, select the date and time range and click "OK".
-
In the "Assets/Aspects" section,
-
Select the tenant or subtenant to get the respective assets.
-
Select the assets and aspects from the corresponding list.
-
Click "Preview & Save".
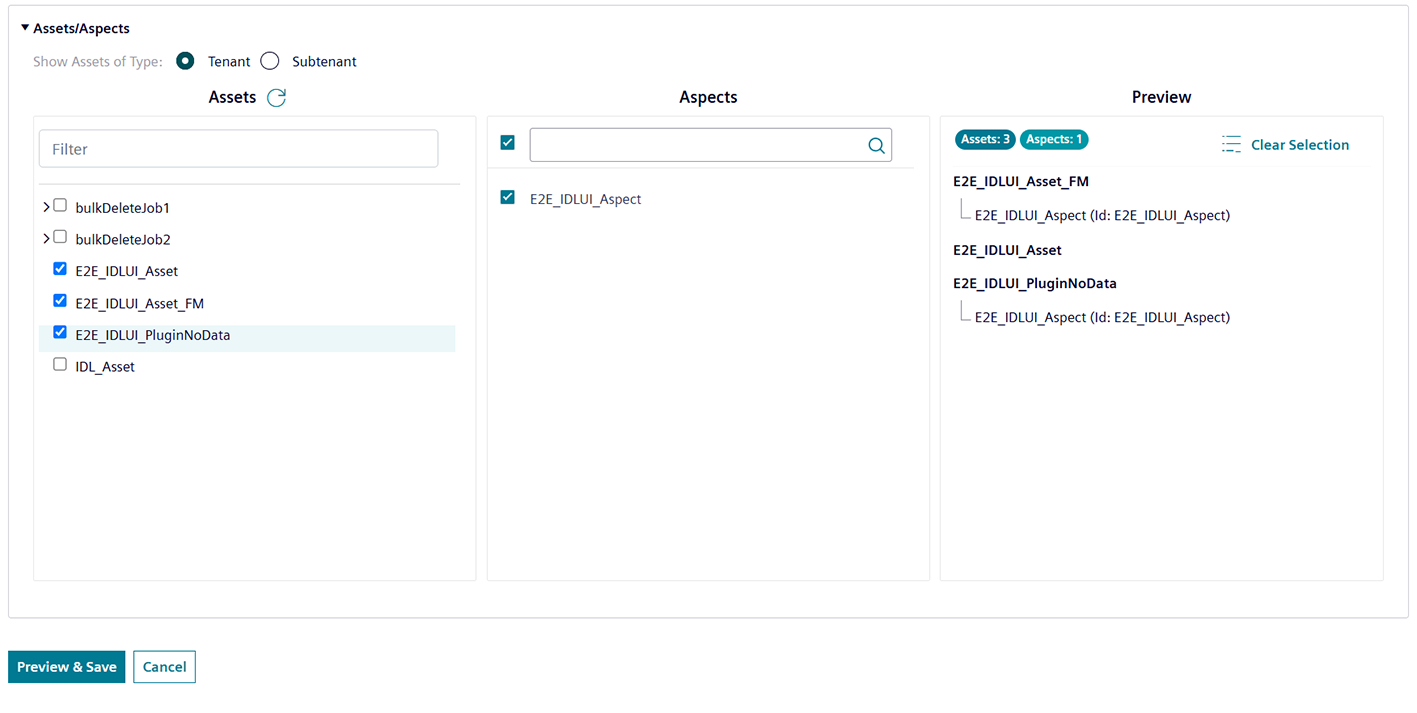
Note
To refresh the asset list, click
 .
. -
-
Check the task preview details and click "Save".
Info
The application provides the information about the existing bulk imports with the "Asset ID".
Note
- Data can be imported only once for the specified "Date/Time Range" and "Assets/Aspects".
- A maximum of last 90 days data can be imported.
- Imported Time Series Data (parquet files) will be available in Integrated Data Lake for seven days from the time of import.
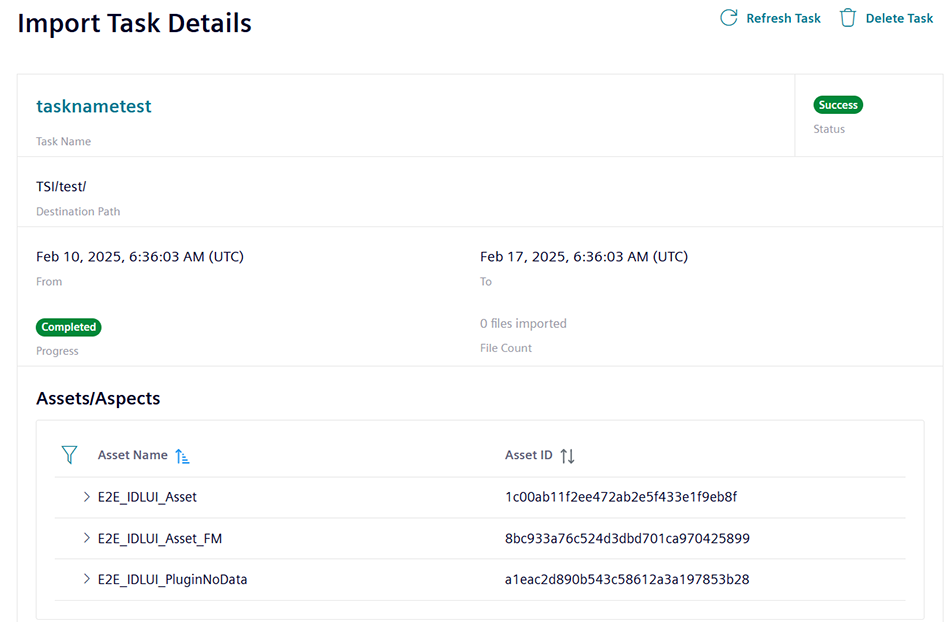
The "Import Task Details" screen is displayed with "Success" status.
To get the latest status of the imported task, click "Refresh Task". To delete the task from the task schedule screen, click "Delete Task".
Scheduled Import
In "Scheduled Import", you can schedule the import of Time Series Data with a frequency of "Daily", "Weekly" or "Monthly". Based on the frequency selection, your data will be imported in Integrated Data Lake.
Procedure
To create a scheduled import data, follow these steps:
-
In the left navigation, select the "Time Series Import" tab and click "Schedule Import".
-
Click
 .
.
The Import Time Series Data screen is displayed. -
In the "Basic Info" section, enter the "Destination Path" and the "Task Name".
Info
The "Destination Path" refers to the storage path where the time series data will be stored in Data Explorer.
-
In the "Schedule Details" section, select the required frequency for importing the time series data:
-
Daily: Imports the Time Series data on daily basis.

-
Weekly: Imports the Time Series data on weekly basis on the selected day of the week. Ensure that the selected end date allows at least one time series import to be completed.

-
Monthly: Imports the Time Series data on monthly basis on the selected day of the month or on the last day of the month. Ensure that the selected end date allows at least one time series import to be completed.

Note
Task runs on the scheduled time and fetches the data until the previous day of the execution date.
-
-
In the "Assets/Aspects" section,
-
Select the tenant or subtenant to get the respective assets.
-
Select the assets and aspects from the corresponding list.
-
Click "Preview & Save".

Note
A maximum of five asset and aspect combinations can be selected.
-
-
Check the task preview details and click "Save".
The status of the created task is described below:
- Active – This status is displayed once the task is created and it is possible to extend the "End Date" of the task.
- Inactive – This status is displayed if any asset or aspect is deleted from the task.
- Expired – This status is displayed after the completion of the last scheduled task. Once a task expires, you need to delete it and create a new one.
Note
A maximum of ten scheduled tasks can be created.
The scheduled Time Series task is created successfully.
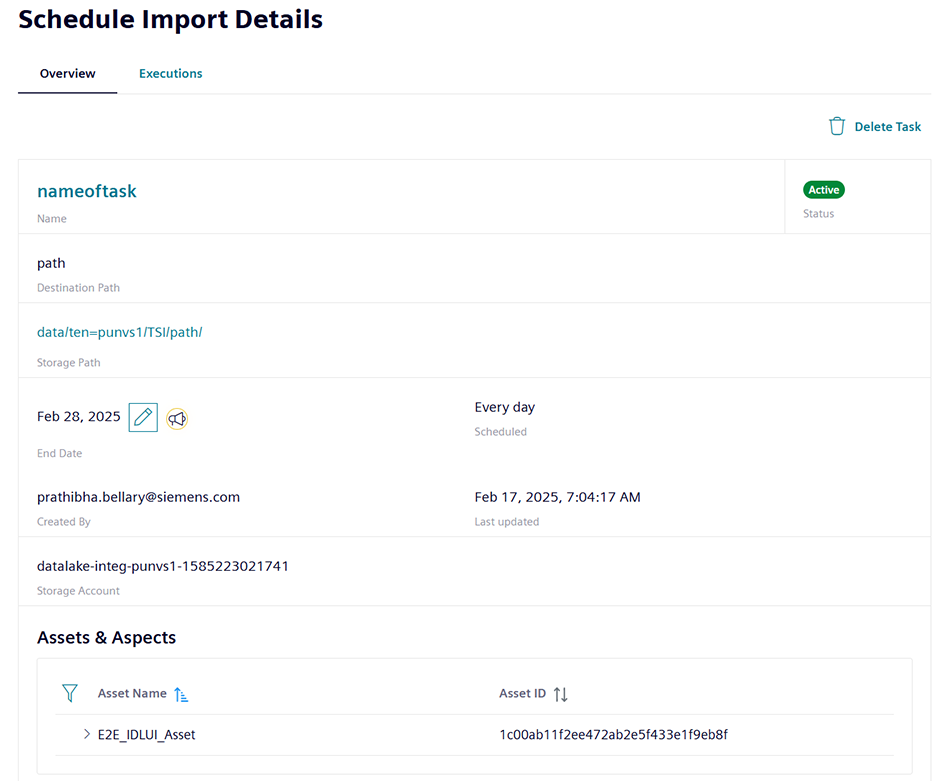
In "Schedule Import Details", click "Executions" tab to view the scheduled import tasks list.
