Managing CMMS Connections
CMMS Connections establishes and configures interface with Computerized Maintenance Management Systems (CMMS) or Enterprise Asset Management (EAM) systems. This integration facilitates the seamless exchange of data between Insights Hub and the CMMS. It enables Insights Hub to automatically generate work orders in the CMMS based on detected asset health issues or predictive maintenance triggers. It synchronizes asset master data, maintenance history and operational status between Insights Hub and the CMMS, ensuring data consistency across systems.
If a user wants to send an information about an issue to an external system in order to trigger follow-up actions like ordering inspection, then an interface to that system, e.g. SAP PM can be configured and a case can be forwarded. You can create a CMMS Connections and add the respective endpoint configuration.
The following graphic shows the "CMMS Connections" screen.

Create a CMMS connection
To create a CMMS connection, follow these steps:
-
In the left navigation, select "Administration" and click "CMMS connections".
-
Click "Create".
-
In the "General information" section,
- Select the "Connection type" from the dropdown menu.
- Enter the "Name" and "Base URL".
Note
The base URL should contain the URL protocol/host pointing towards the external CMMS/ESM API. Any configuring endpoints will append their "path" on the base URL.

-
In the "Authentication" section, select the respective type from the dropdown menu.

Parameters Description Basic Authentication - Description of the connection
- Enter the "Username" and "Password"
Note: To enter the Header key details, check the box of "Custom Header Protection"API Key - Description of the connection
- Enter the "API Key value"OAuth 2.0 - Description of the connection
- Enter the "API Key value"
Note: Variables, Authentication URL's, Client ID and Client secret can be added based the requirement -
In the "Endpoints" section, click
 . For more information, refer to Endpoint Configuration.
Endpoint Configuration
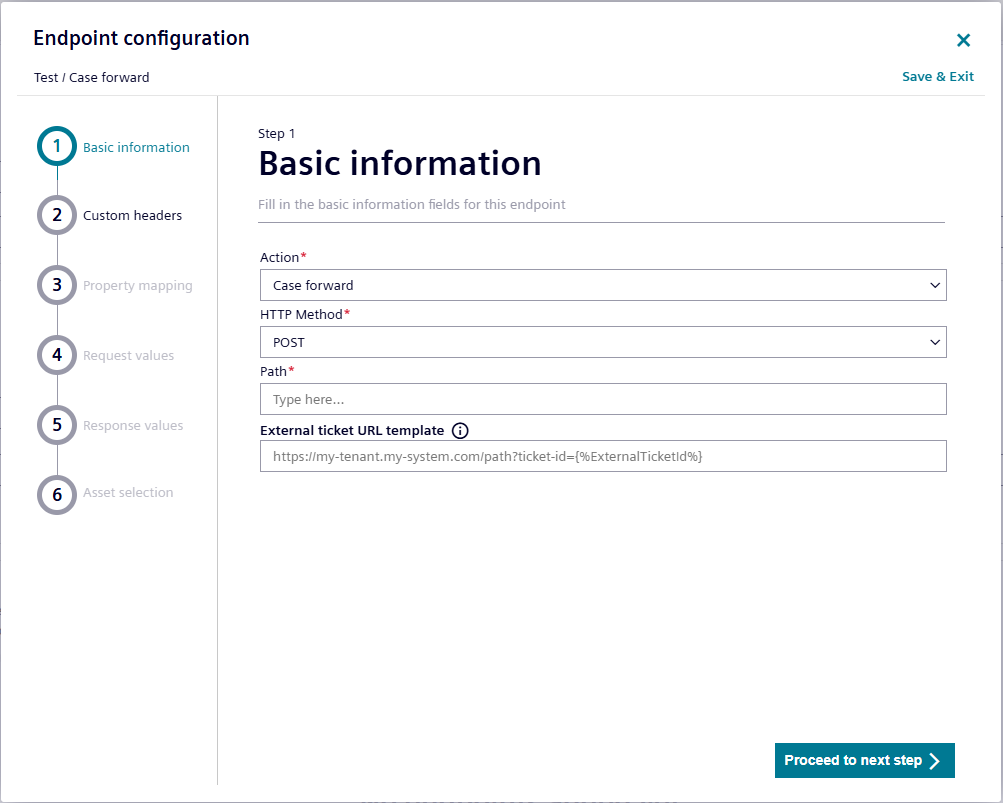
To add the Endpoints while creating a CMMS connection in the "Endpoint" section, follow these steps:
-
In the "Basic information" section,
- Enter the basic information fields for the endpoint.
-
Click "Proceed to next step".
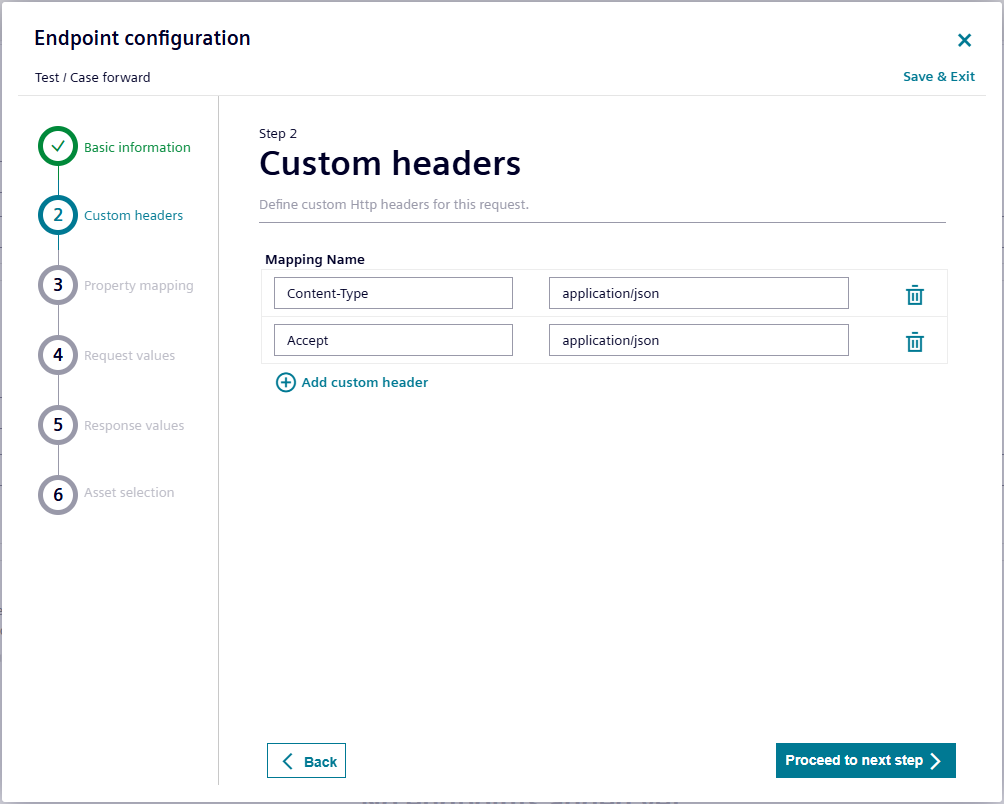
-
In the "Custom headers" section,
- To add the custom Http headers for the request, click "Add custom header".
- Enter the "Mapping Name".
-
Click "Proceed to next step".
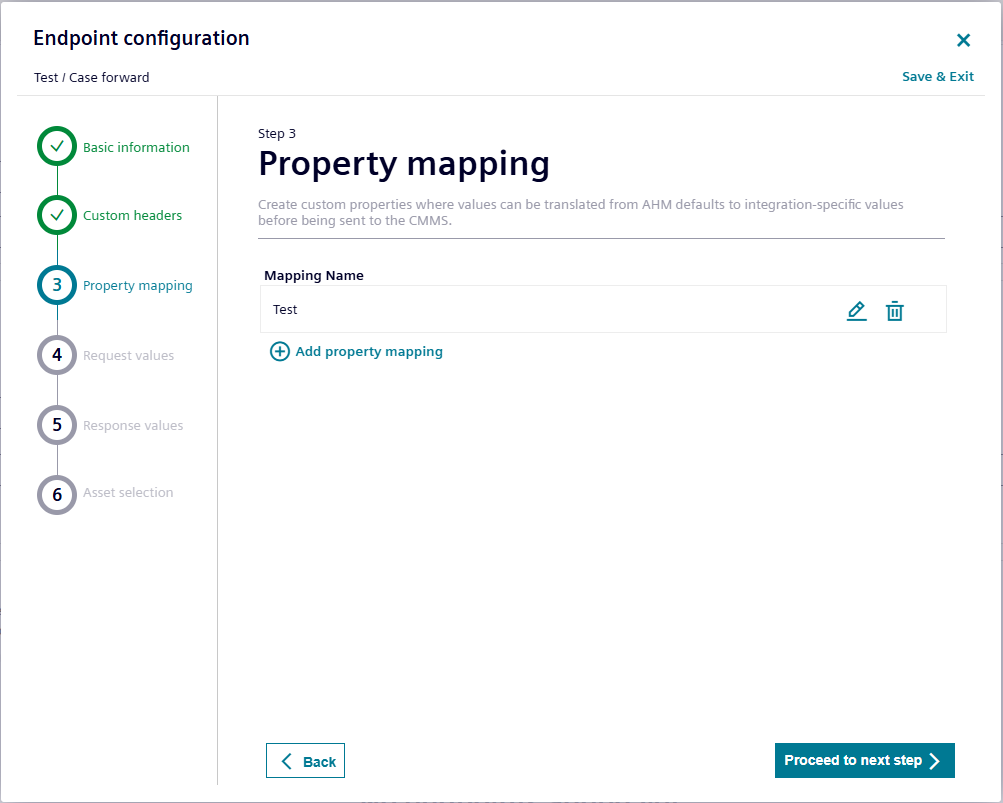
-
In the "Property mapping" section,
- To add the property mapping, click "Add property mapping".
- Enter the property mapping details and click "Submit".
-
Click "Proceed to next step".
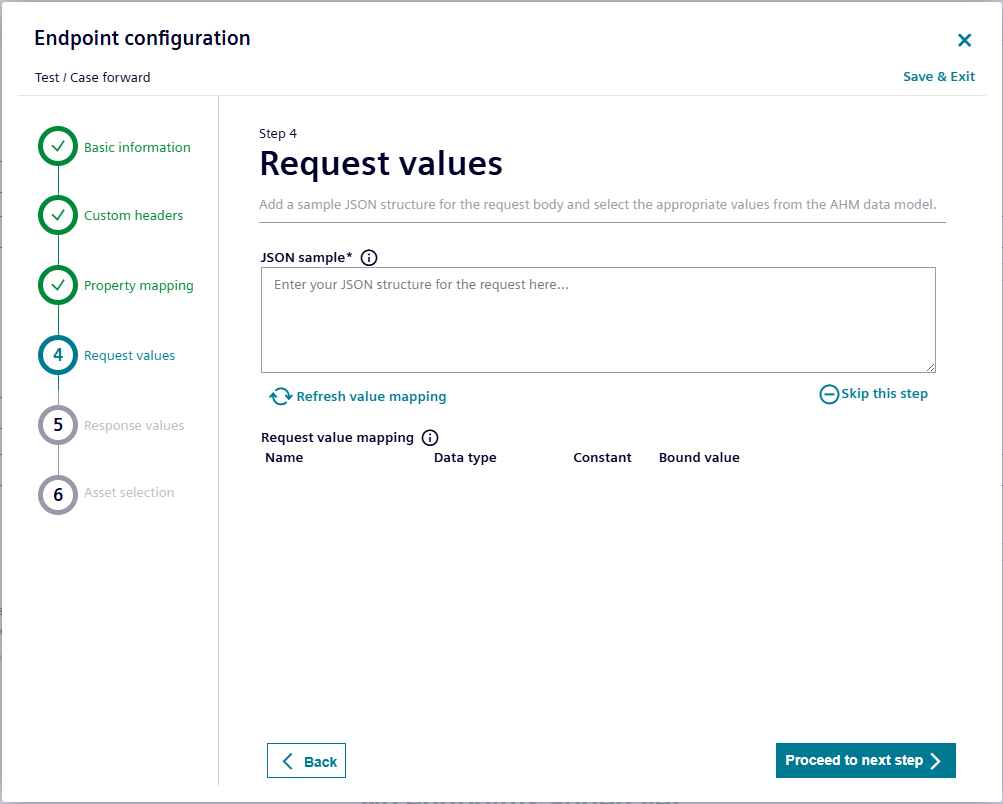
-
In the "Request values" section,
- To add the request body, click "Add a request body".
- Enter the "JSON" sample.
Note
To skip this step, click
 .
.-
Click "Proceed to next step".
-
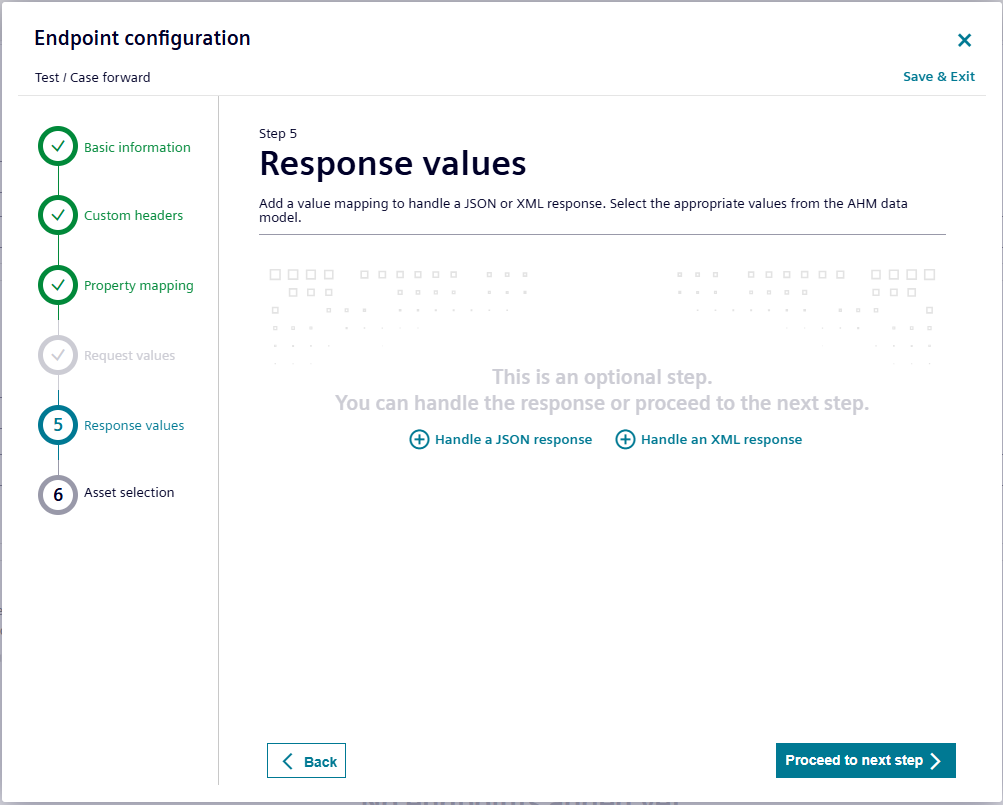
In the "Response values" section,
- To add a value mapping to handle a JSON response, click
 .
. - To add a value mapping to handle an XML response, click
 .
.
Note
To skip this step, click
.-
Click "Proceed to next step".
- To add a value mapping to handle a JSON response, click
-
In the "Asset selection" section,
- To add an asset, click "Add Assets".
- Select the respective asset and click "Update".
- Click "Proceed with review".

- Review the information provided for this endpoint is correct and click "Save".